
Mondo
-
Posts
91 -
Joined
-
Last visited
Content Type
Calendar
Downloads
Profiles
Forums
Gallery
Tutorials
Collections
Posts posted by Mondo
-
-
It feels like a while since I've posted on here, but I thought you might all like to see the latest interior refresh I'm on with.
Seats in black leather, blue topstitch, with brand new Zolda Shadow centres and "Recaro" embroidery. Rear quarters, speaker pods and doorcards in grey leather with grey topstitch (and brand new Zolda inserts).
Many many hours going into this cabin, but it's starting to look superb!


More on Facebook should anyone want to take a look.

-
I made Badger's cover and I've made 3 or 4 since then. They look the part and, as they're completely custom, you can have it in whatever colour or material you want.
They're not cheap though. There's half a hide of leather in each one and plenty of hours involved in making them....
-
Your work shows you care about what your doing rather than the money ( like me) excellent work although the colour scheme is a personal thing and not what I would have, it still is a top job well done.
Don't get me wrong; this is how I make a living, so the money is important. But the job has to be right as well because, at the end of the day, I'm only ever as good as my last piece of work.
I know for future reference now how difficult these parts are to trim so I will price accordingly.
Everything was delivered in person to Tony yesterday and he seemed very happy with the results, especially after such an inordinately long wait! It was good to finally meet him (and his family) and I think we can probably expect some fitted pictures in the very near future.
Now I have another Cabriolet to finish, if you'll excuse me....

-
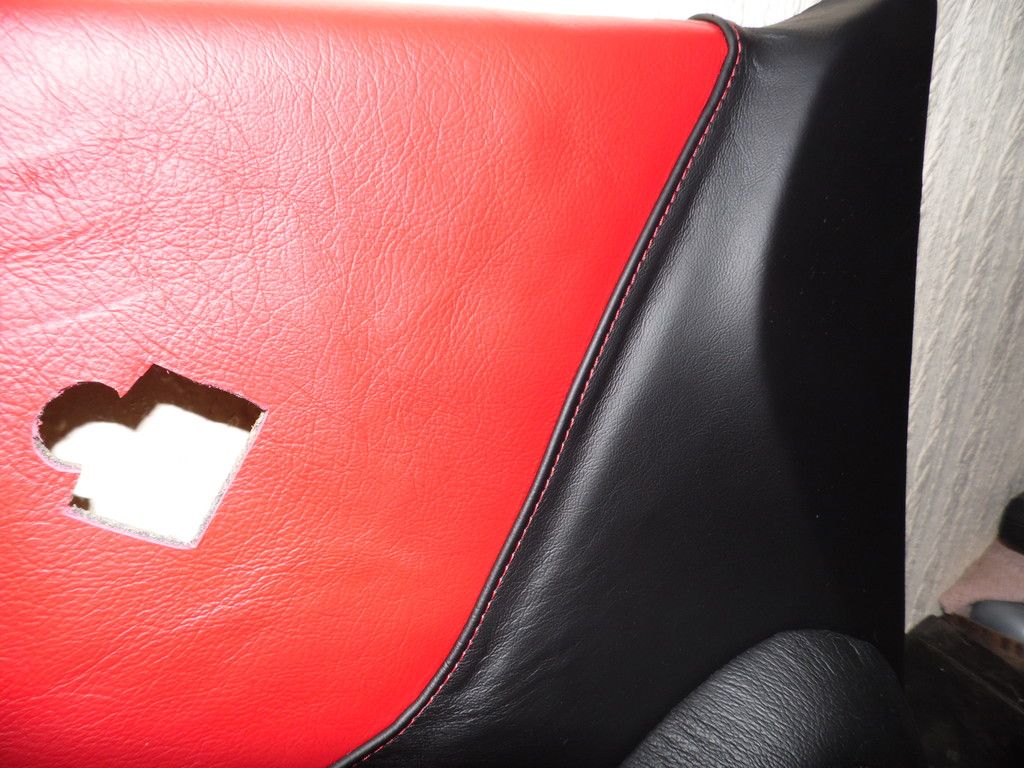
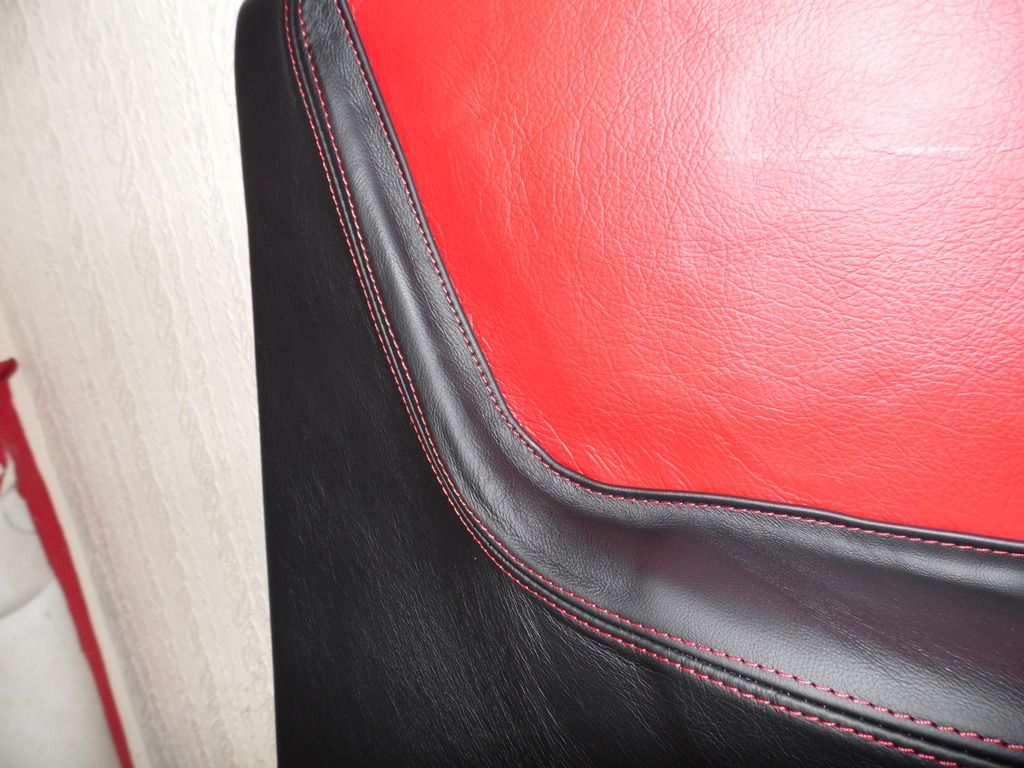
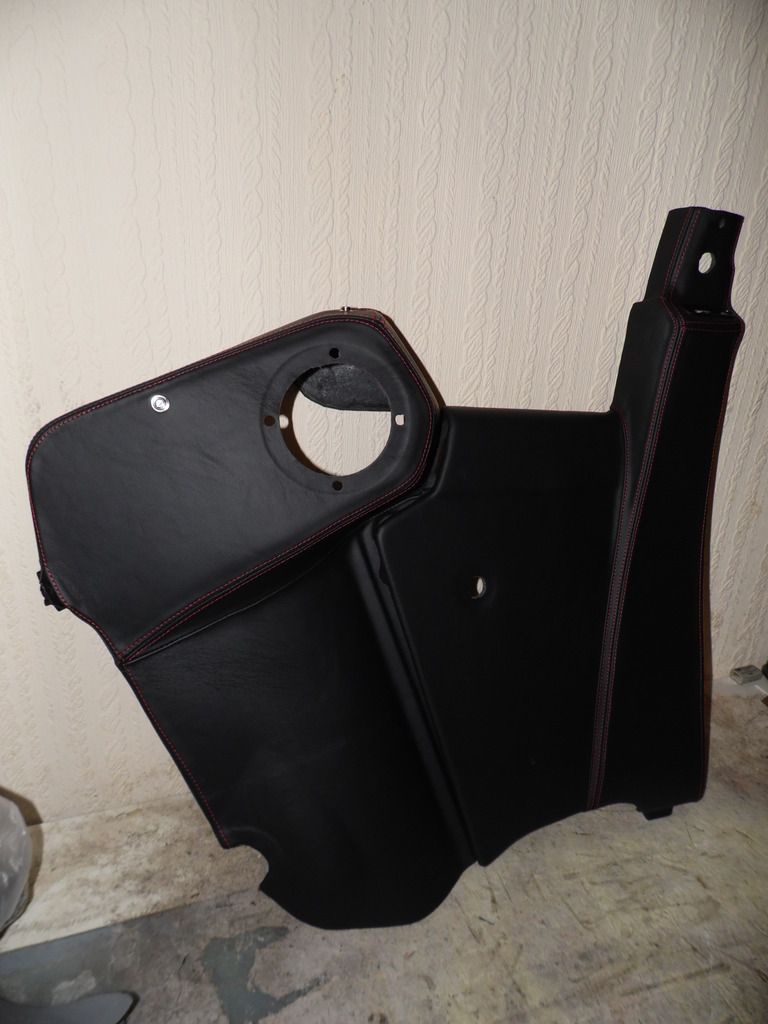
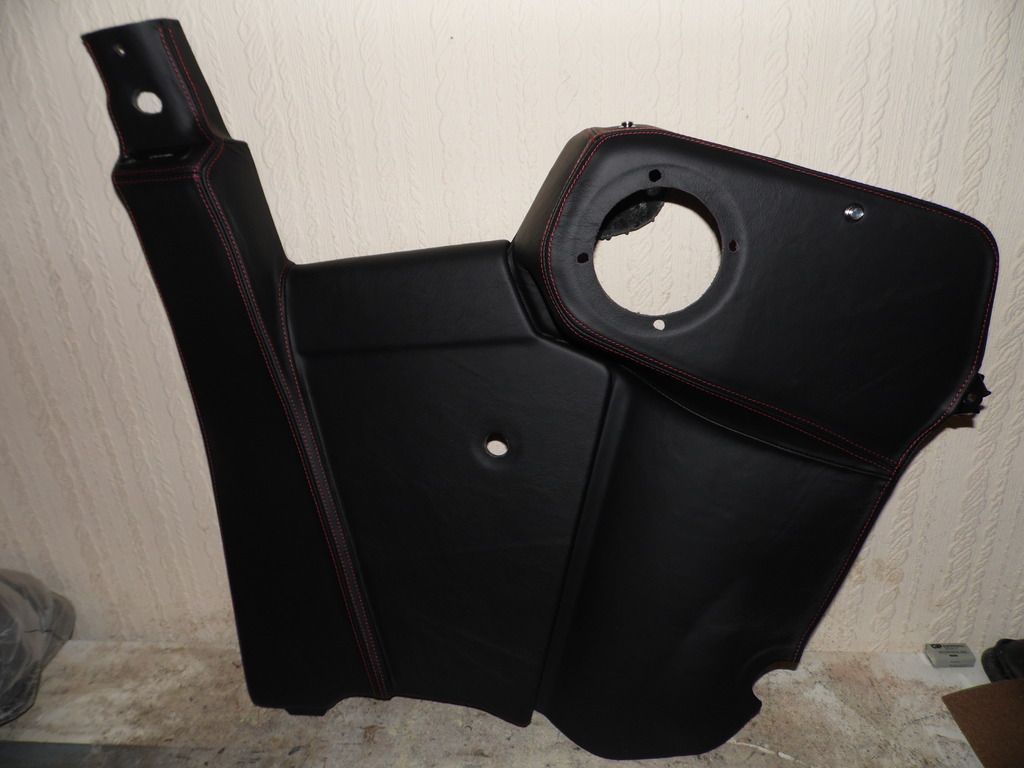
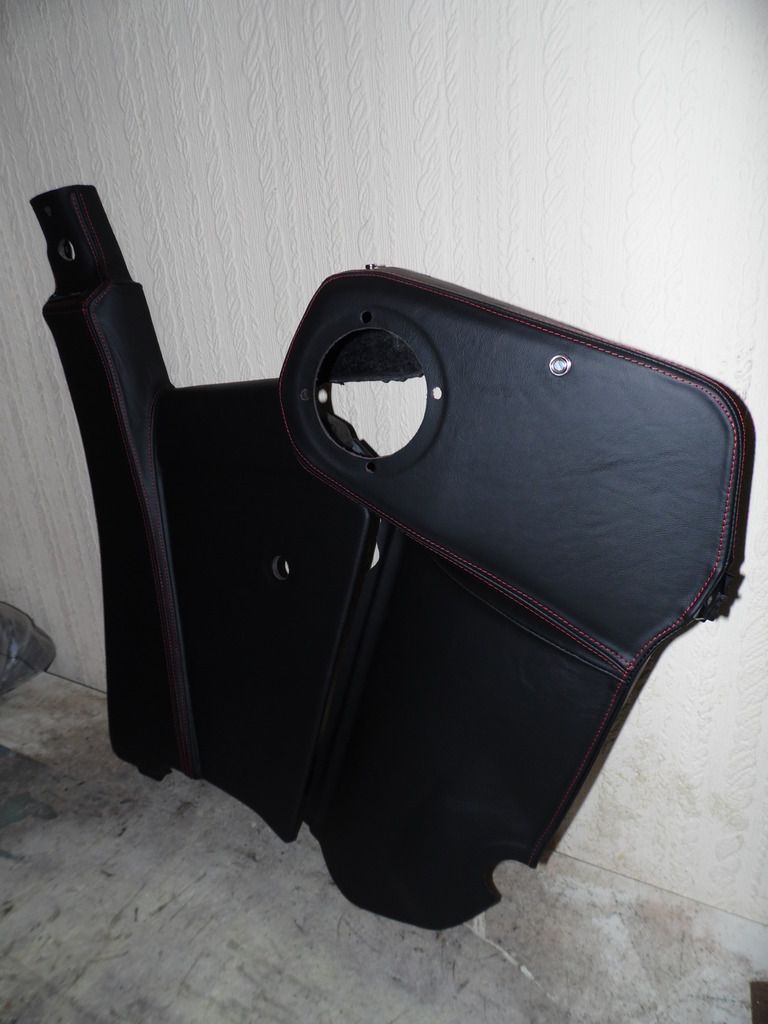
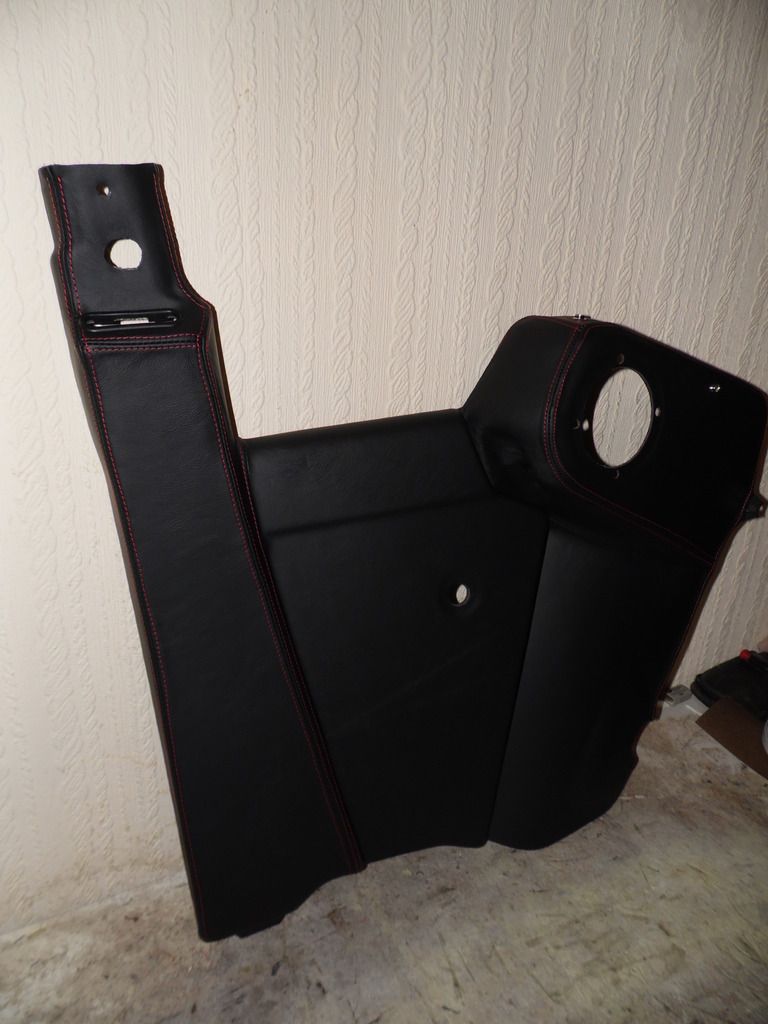
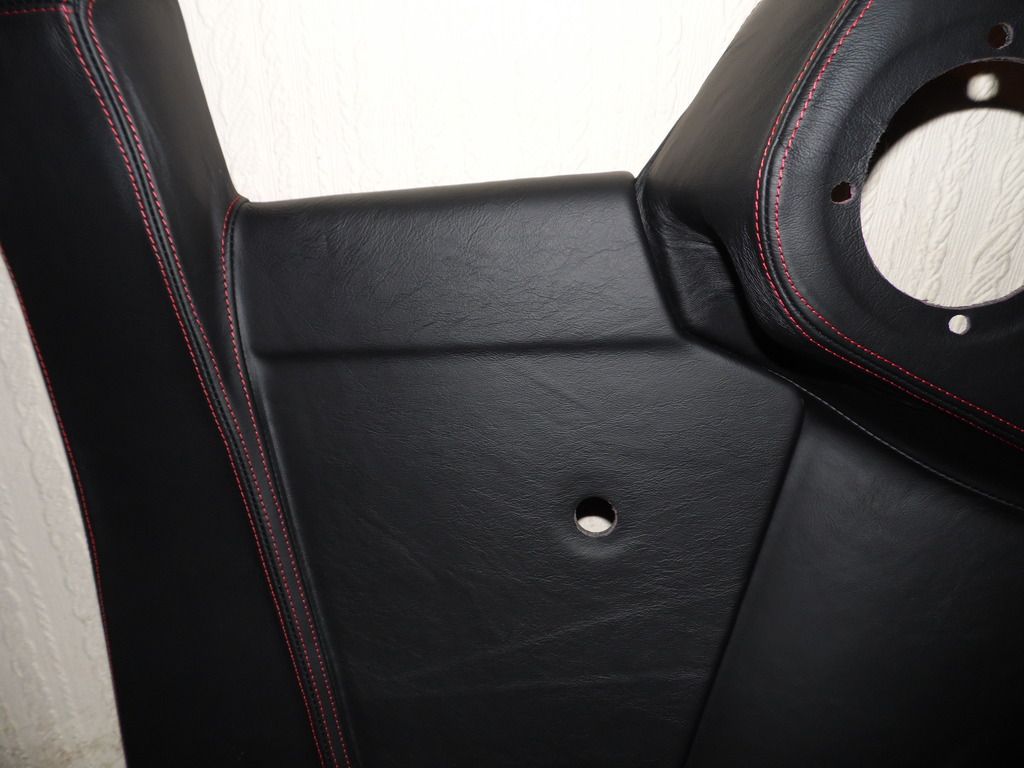
Time for the final piece of this particular puzzle: the doorcards!
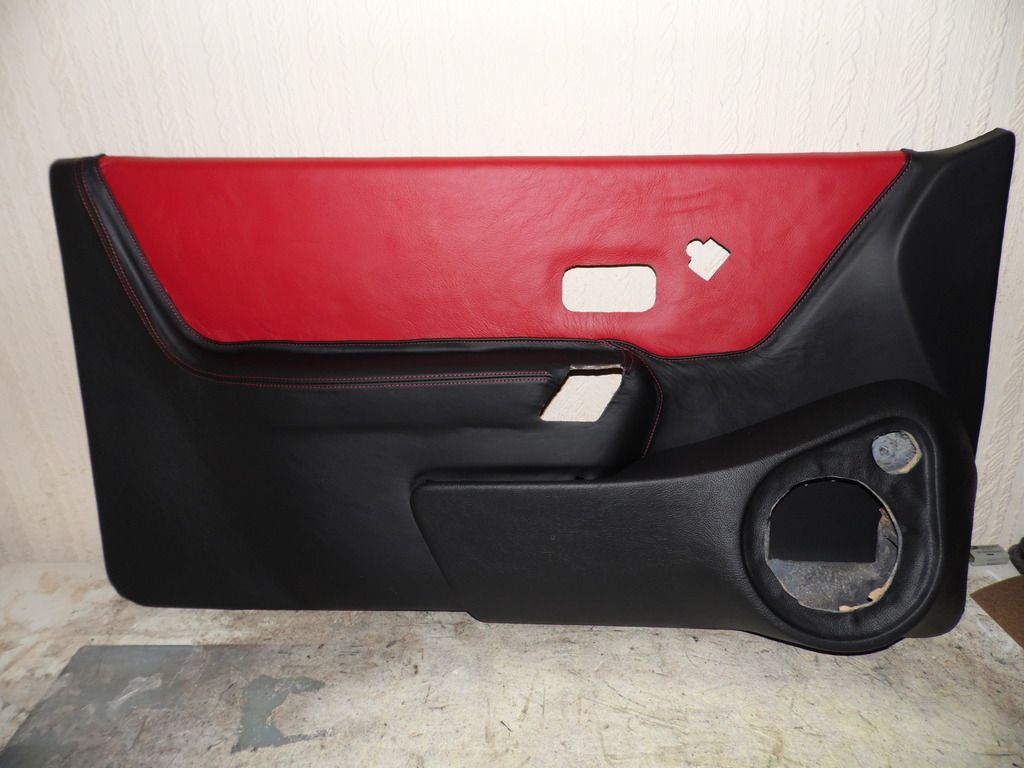
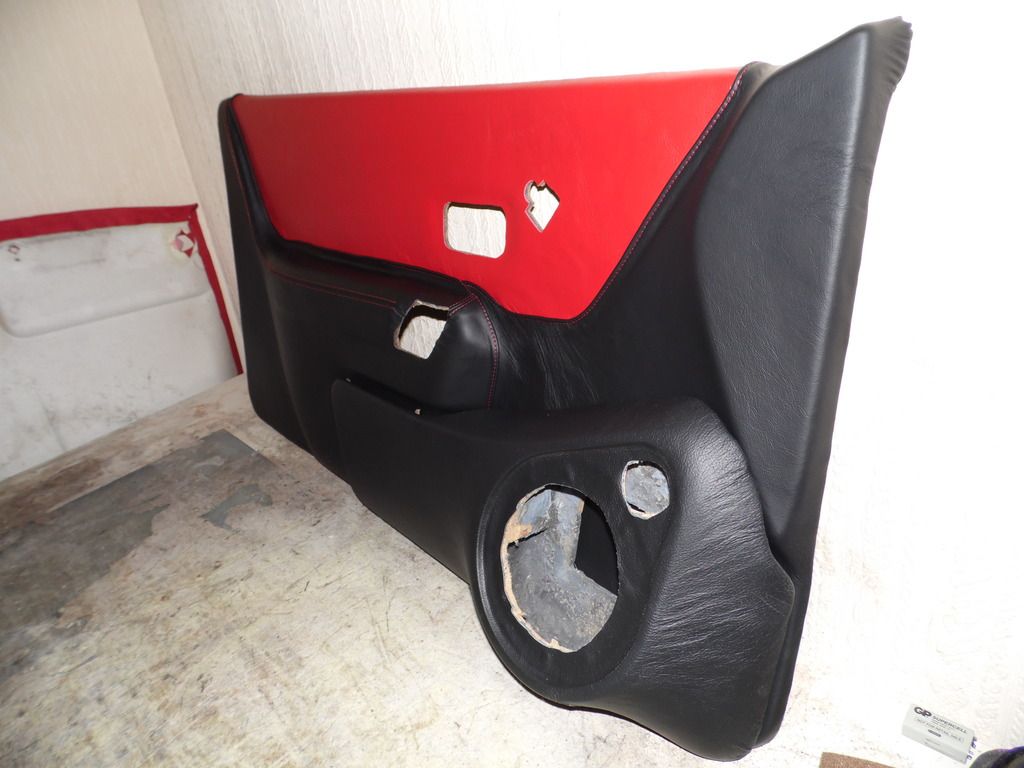
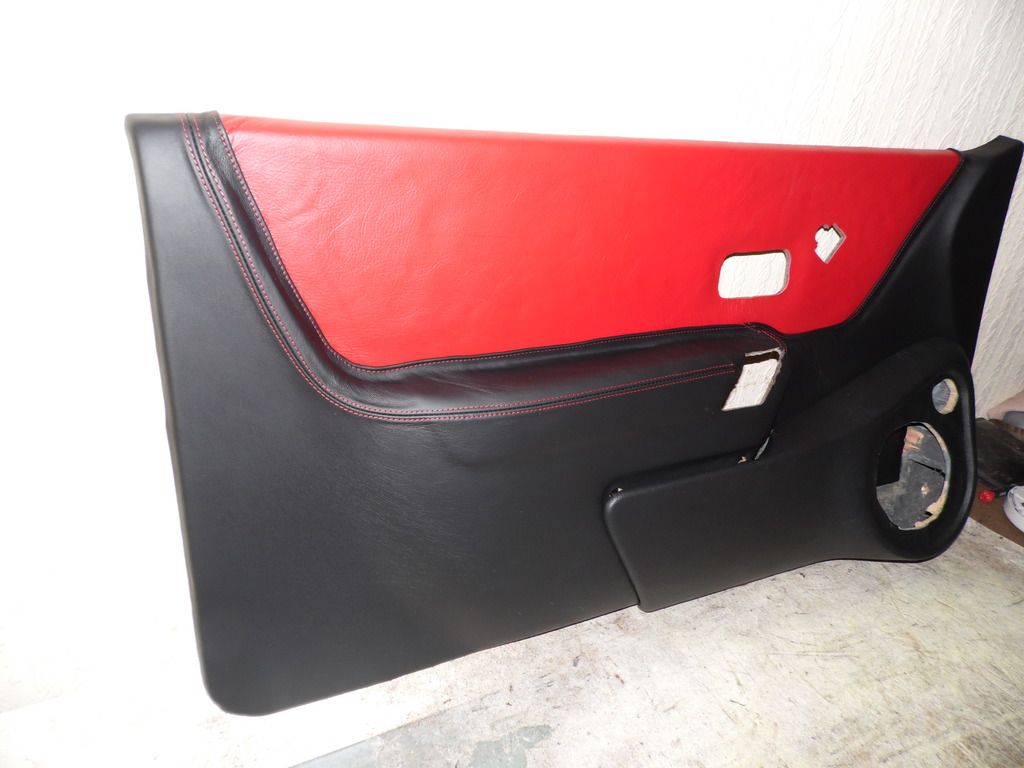
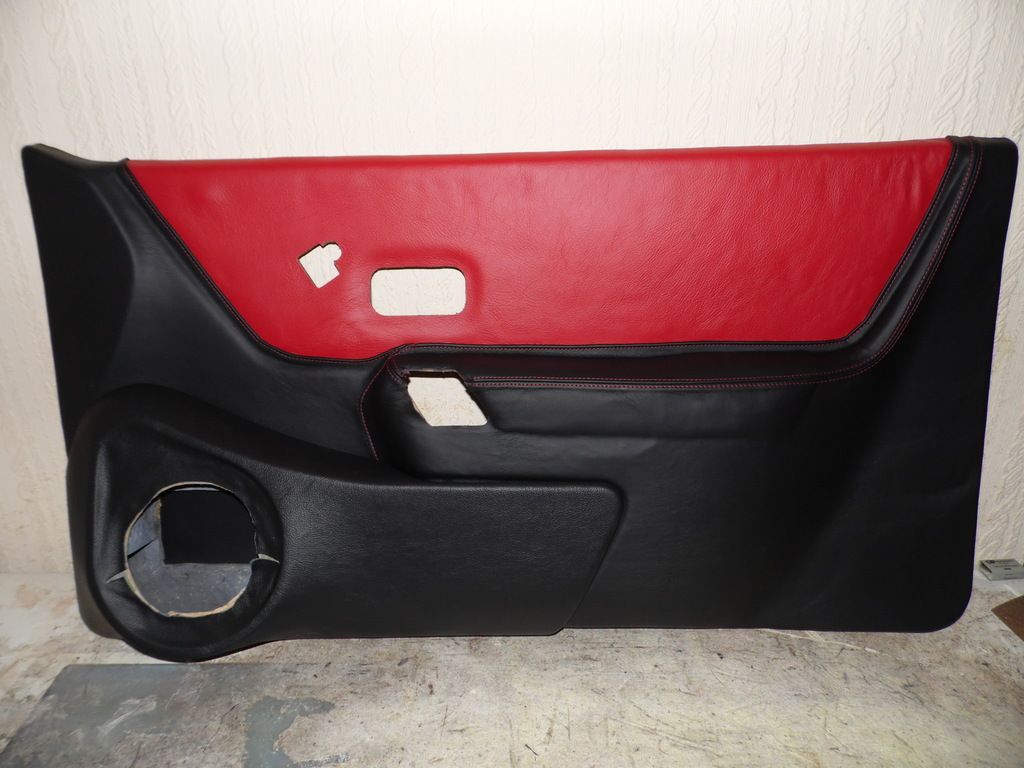
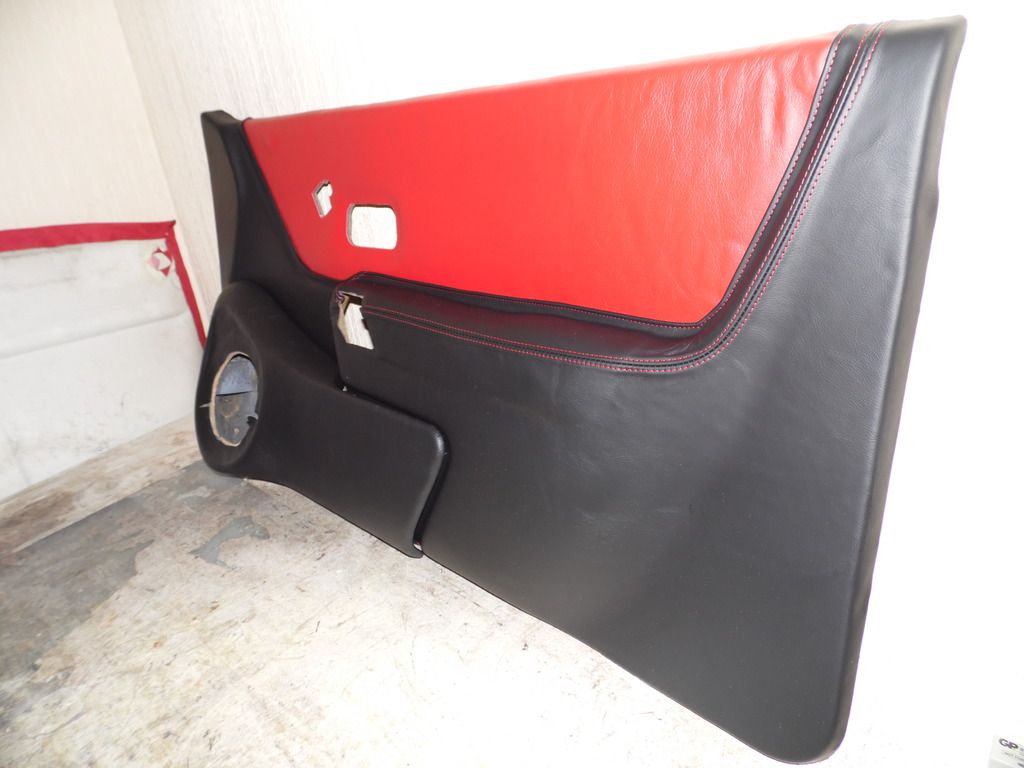
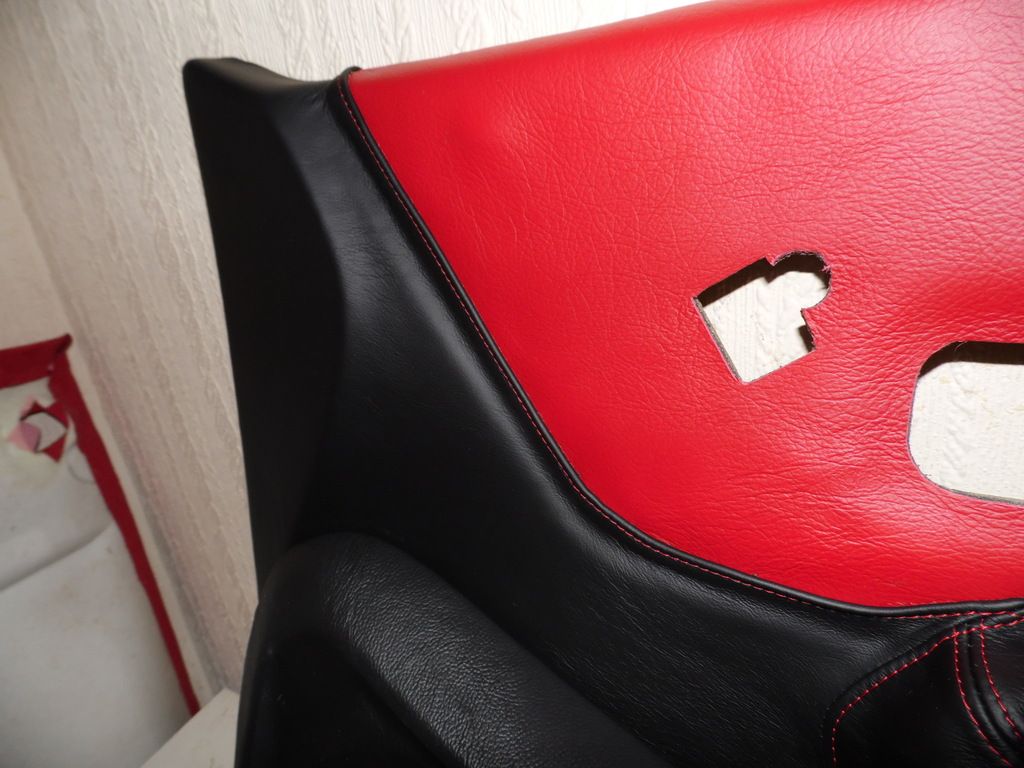
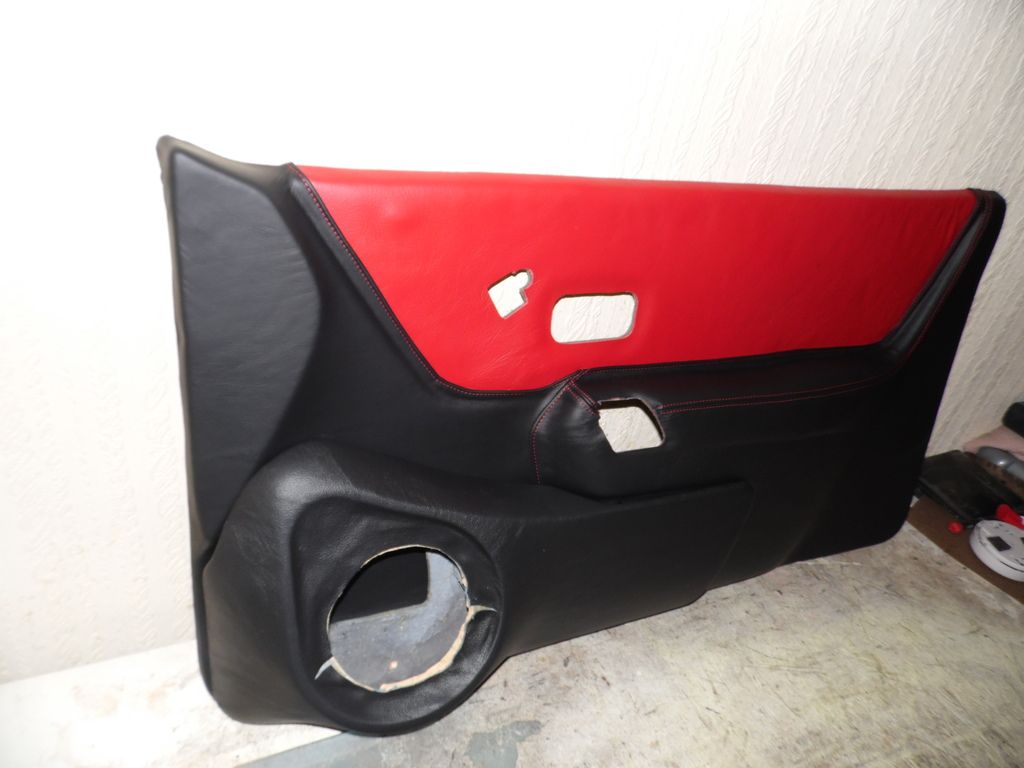
Tony's doorcards had some pretty substantial damage and repairs to the armrest sections and that has, unfortunately, affected the smoothness of the finish in a couple of places
 That said, these do look very nice indeed still and hopefully the red leather section (replacing the original fabric insert) should help to draw the eye to it and away from the armrest below.
I've deliberately kept the design of the doorcards fairly simple, mainly due to that red leather insert. I thought that too many topstitched seams might spoil things. The light still catches all the contours and angles of the doorcard anyway, so it doesn't look like a flat expanse of black leather.
That's me done then. I actually have another set of seats and panels that I'm finishing at the moment - these are to be much more OEM than Tony's are - so I'll bung some pictures of those up in due course for anyone here that doesn't follow me on Facebook.
-
You live and learn,the good thing is that you have achieved a piece of quality work and have that on your cv for the future.
Very true. Hopefully Tony will be over the moon when he FINALLY gets his retrimmed interior back on Wednesday morning!!
-
Amazing detail,I don't think to many people would take that on. One or to I have spoken to won't even touch door cards.
These panels are quite the chore, to be honest. Mainly because they're such peculiar angles.
In hindsight, I kinda wish I hadn't taken these on - the job certainly wouldn't have taken as long or cost me as much had it just been the seats! But it's good to stretch yourself from time to time and I think everything's turned out very well indeed. I can understand why a lot of trimmers won't touch them though... I'll certainly be charging a lot more in future should any other Escort owners fancy a fully bespoke cabin!
Driver's doorcard is now complete so I'll stick some pictures up once its twin is completed.
-
Thread resurrection time!
I have to hold my hands up here and claim full responsibility for Tony's "12 Week Project" somehow dragging on for over 18 months! There's a lot of completely bespoke work going into his cabin and, in my defence, it's taken me a lot of time (and cost me a lot of money) to get to a level of finish that I'm happy with. I'm actually taking his full interior down to him this coming Wednesday so his months and months of incredibly patient waiting will finally be at an end!
So, as a bit of an update, let's take a look at his rear quarter panels and speaker pods, shall we?
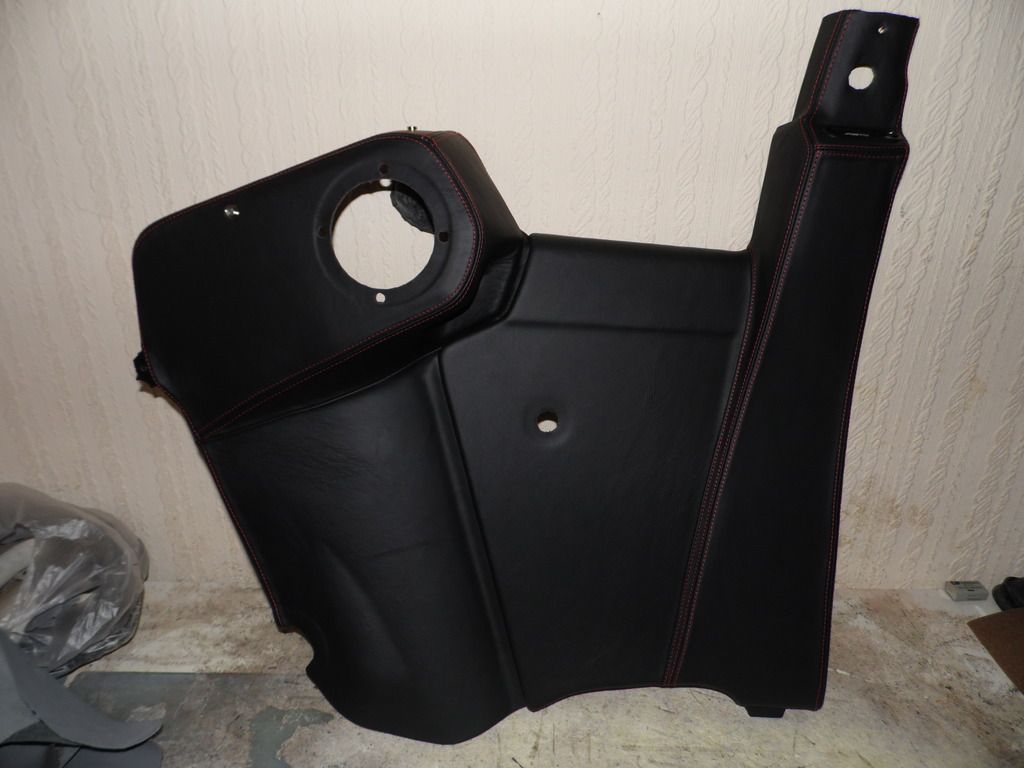
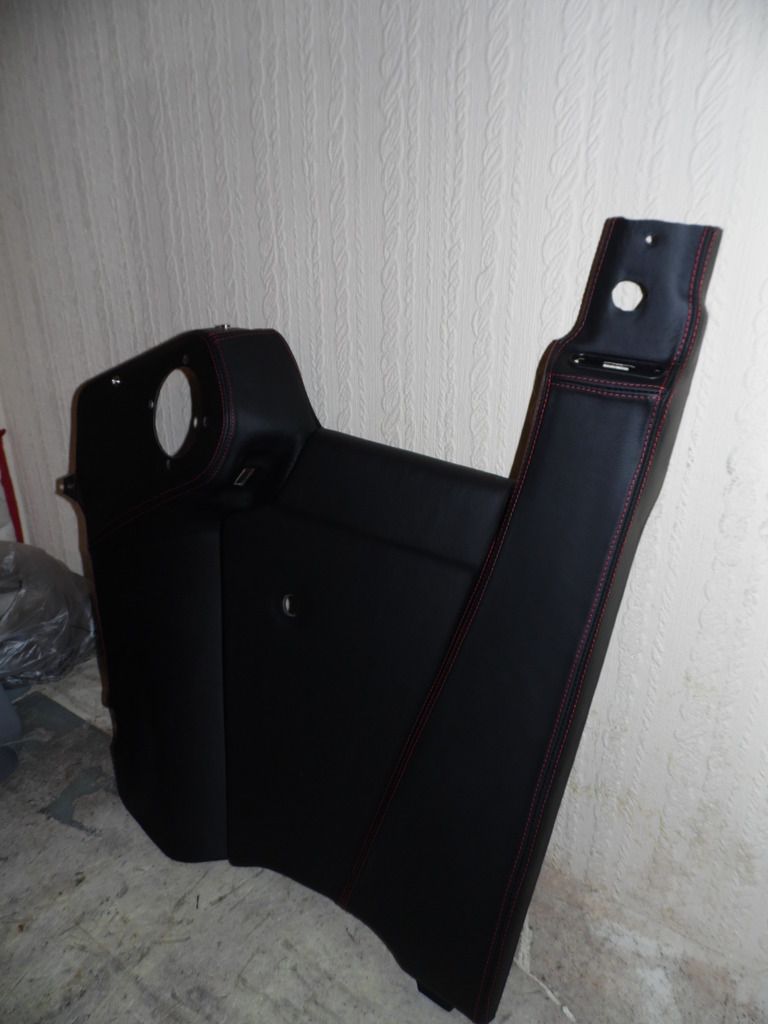
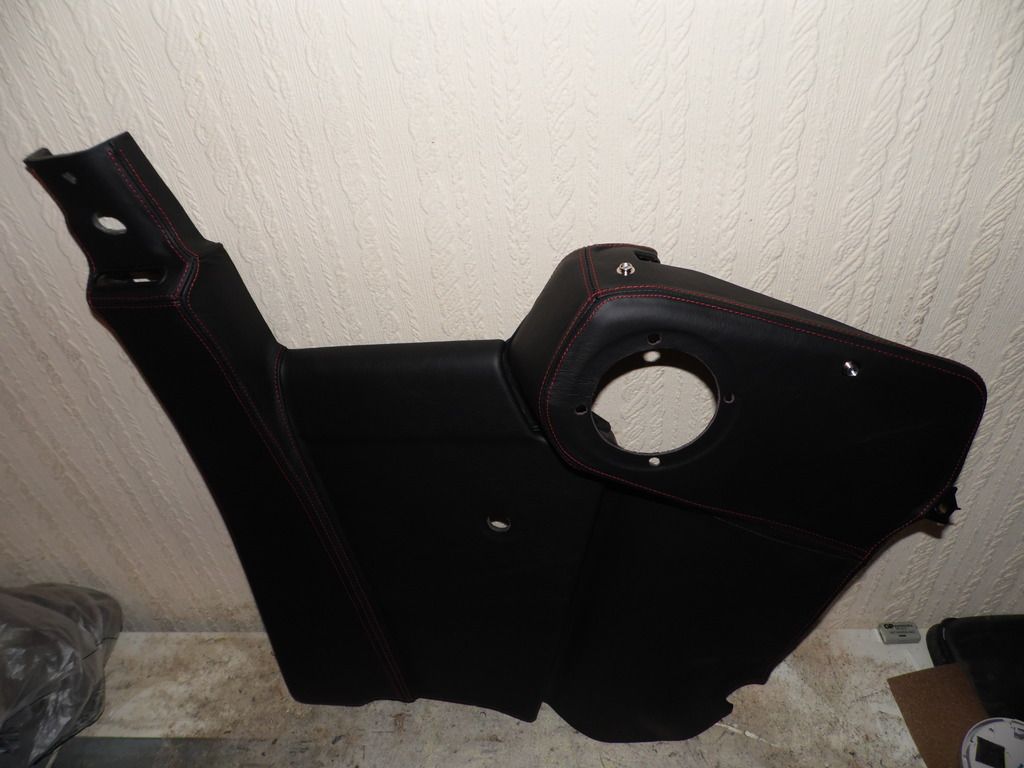
Everything about these panels is unique! The pods are made up of 5 separate pieces of leather and, even though you might think they're the less complex shape, the quarters use 6 pieces per panel. These things are SERIOUSLY labour-intensive and there's honestly no quick way to do them. To give you an example (and I timed all of these); the design of the speaker pods took just shy of 8 hours, making each cover (from cutting the leather to the final stitch) was 3 hours (so 6 hours for the pair) and prepping the panels, fitting the covers and finishing them took 4 hours for each one.
So for the pair of rear pods alone, that's 22 working hours from start to finish. That's a lot of work!!
I think that they look pretty snazzy though, and they should certainly elevate his interior above "a simple seat retrim."
Any thoughts from anyone else...?
-
Glad to see that this hard work's getting a bit of love on here and over on Facebook
And we're cooking on gas now too!
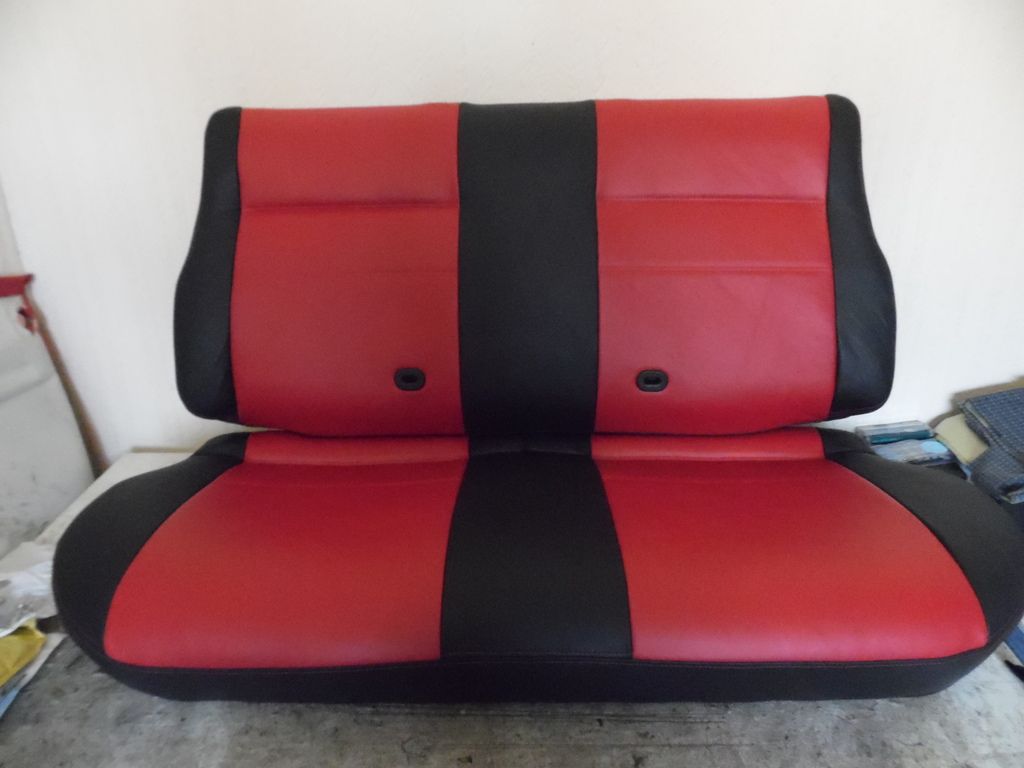
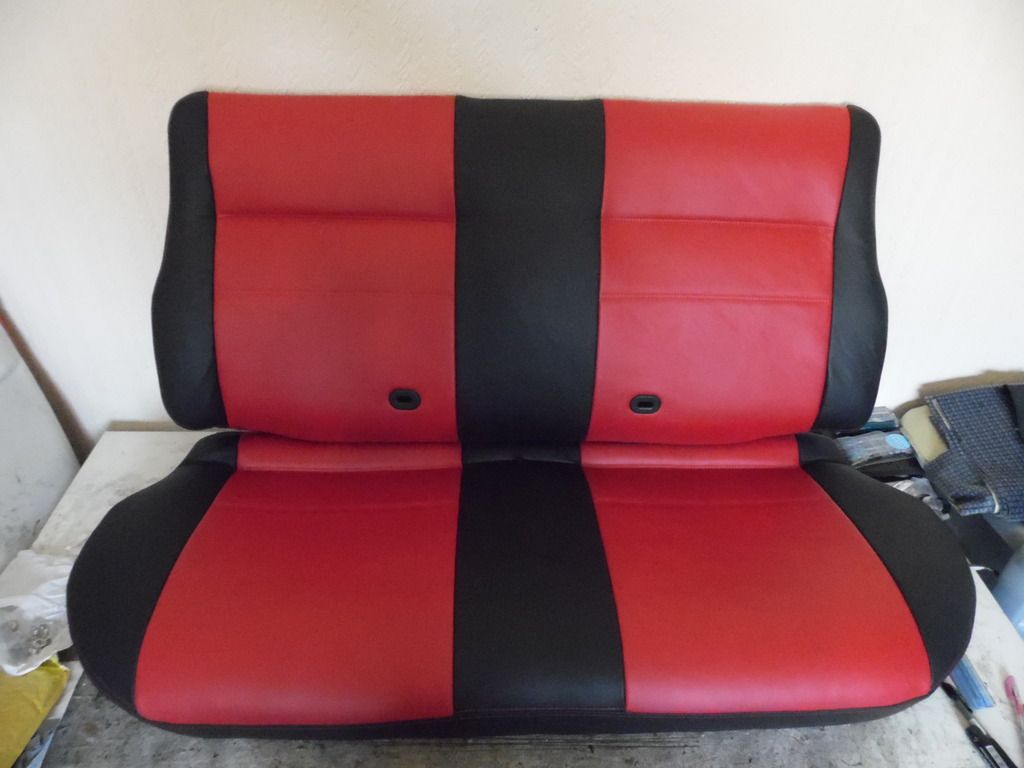

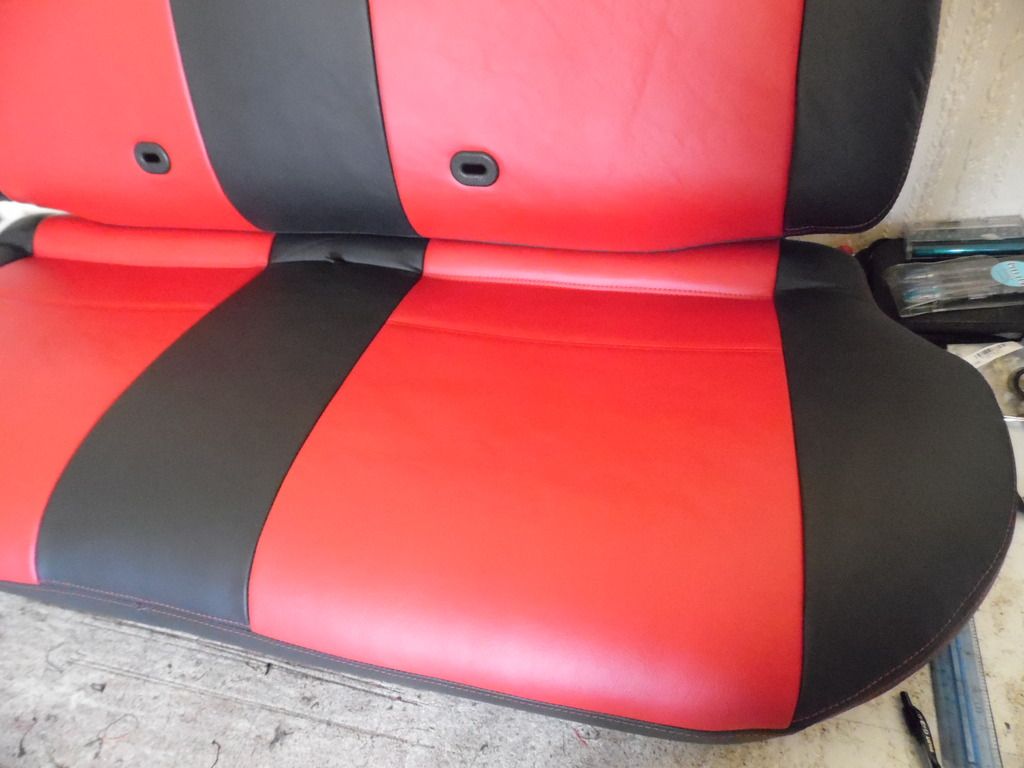
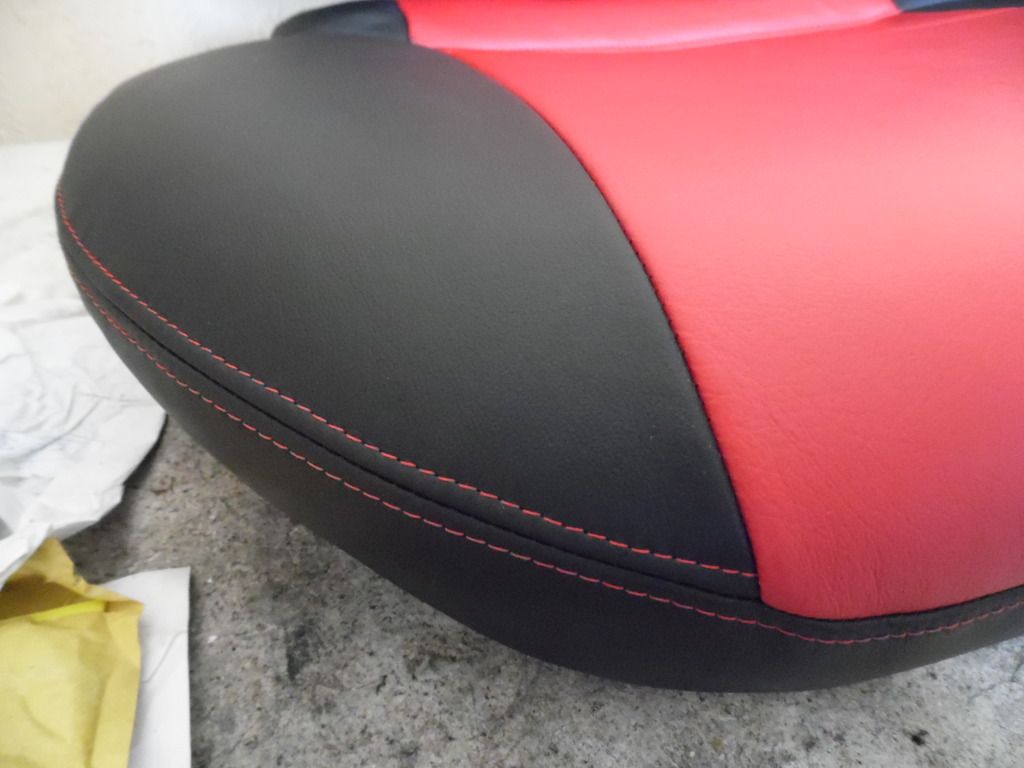
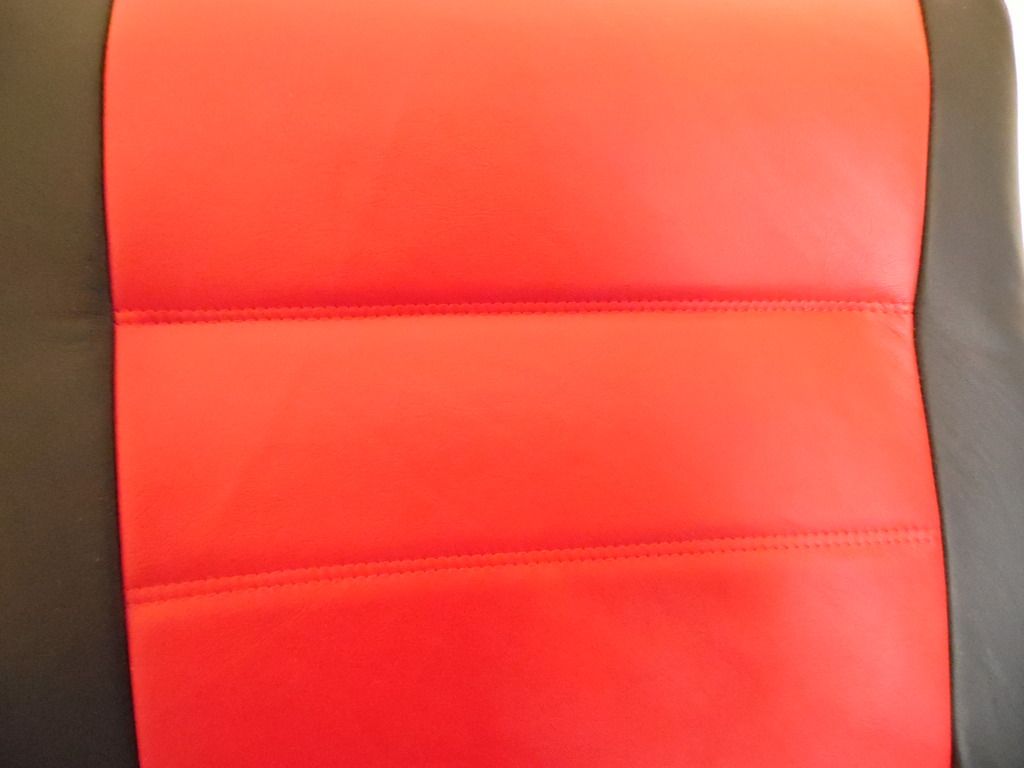

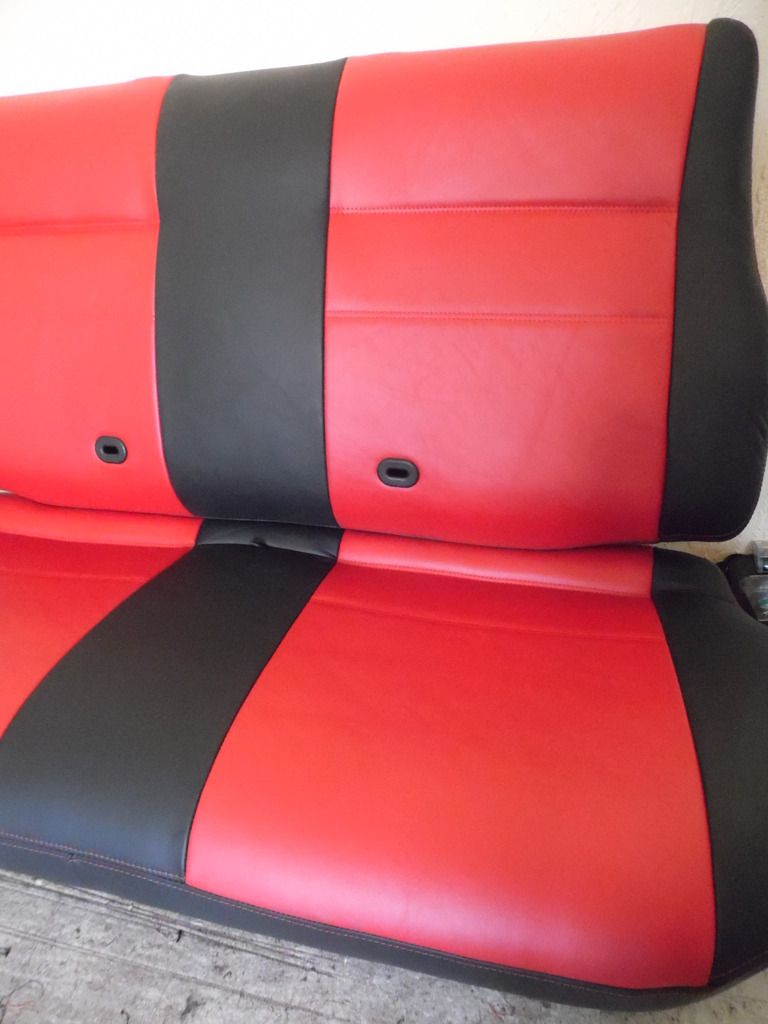
Rear seats completed. I had to get a new pair of the plastic channels (in the rear upright) from Maido as they were missing on these seats, and the black adds a nice touch against the bright red of the seat centres.
Still plenty left to do yet, but I'm happy that there;s some good progress for Tony and everyone else to see!
-
Time for another update:
Front seats completely finished now and boy, do they look and feel pretty! As well they should do... I mean, I've only had this interior here for nearly 12 months...!!

Next week will see me tackling the rear seats and tonneau cover, then the doorcards (can't wait!) and rear panels and the job is jobbed...
I bet Tony's almost forgotten he even had an interior for his car.....!!
-
Right, time to get this thread back on track!!
Let's see if these whet any appetites on here...
They look and feel absolutely gorgeous...! Gonna be one seriously striking interior when it's finished this month :thumbs:
More updates as they happen soon and apologies for the long gap between the last one and now....
-
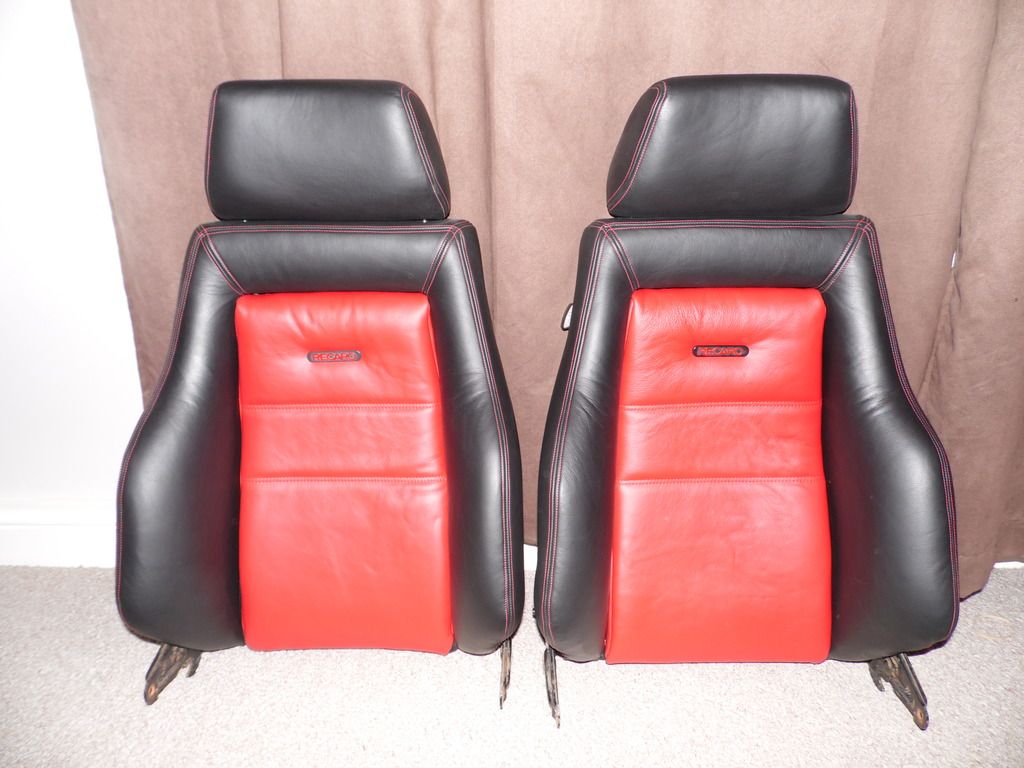
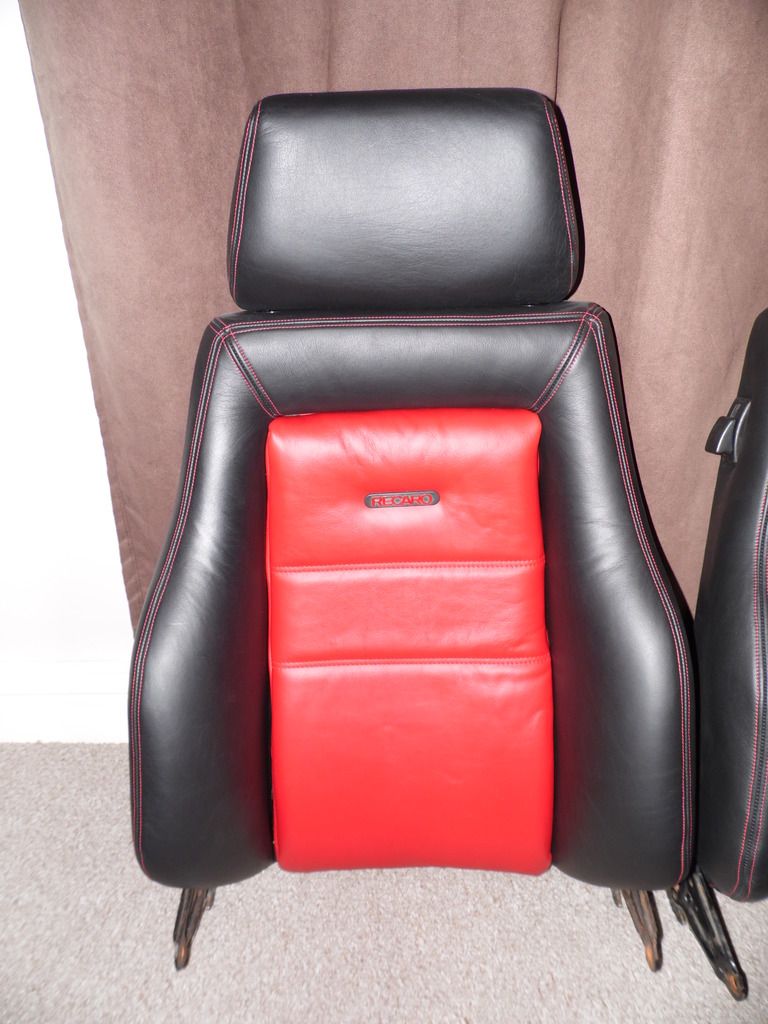
This interior will be a combination of Perrone Noir black leather for the outers and Andrew Muirhead Ingleston Scarlet leather for the centres - both absolutely top-class leathers and both completely automotive and aviation spec.
-
Anyway, troubles with seat bases aside, I thought I'd add a little something to this thread. Aside from having two passenger seats (yep!), there's no issues with the uprights so here's how they're looking at the moment:
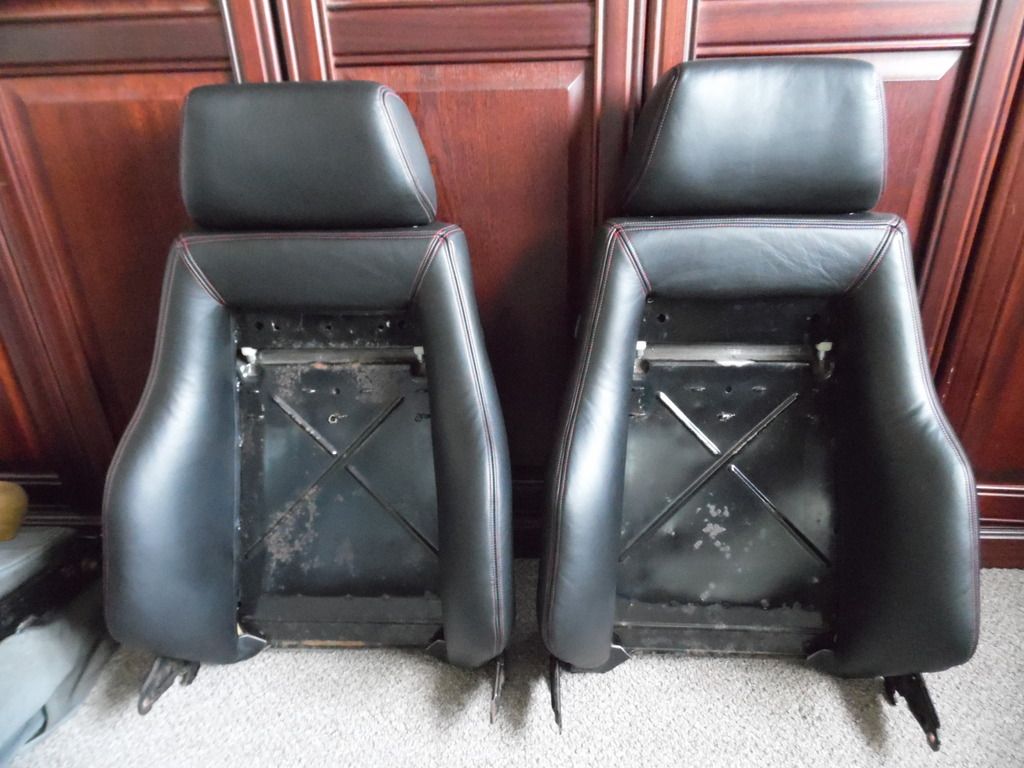
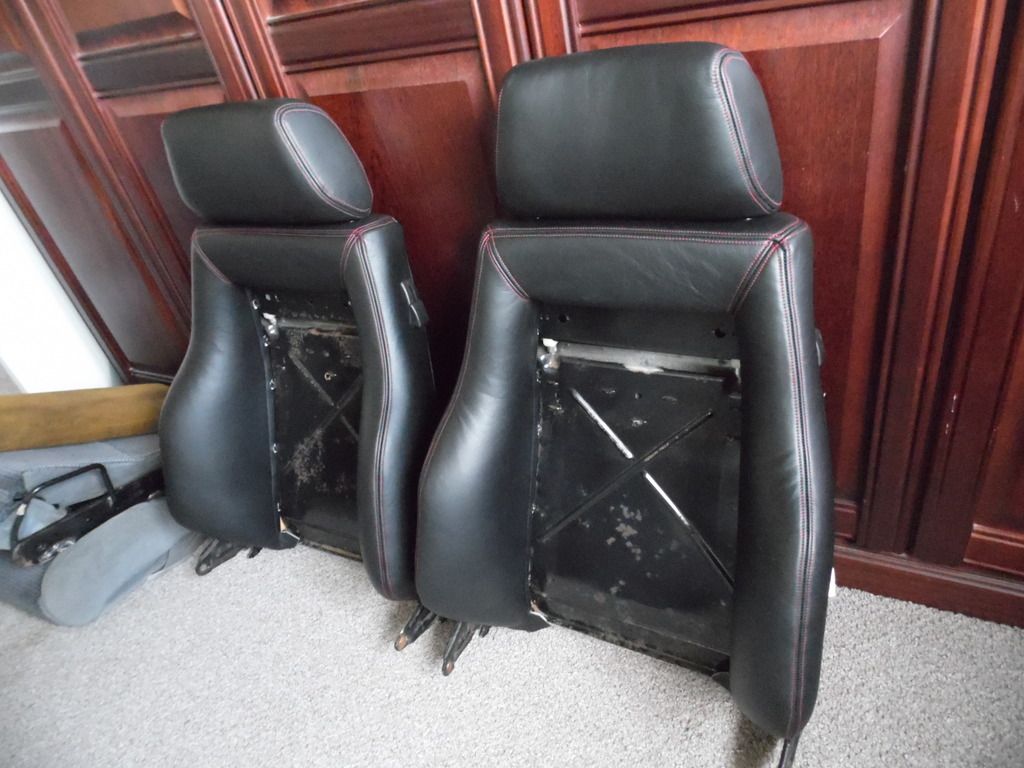
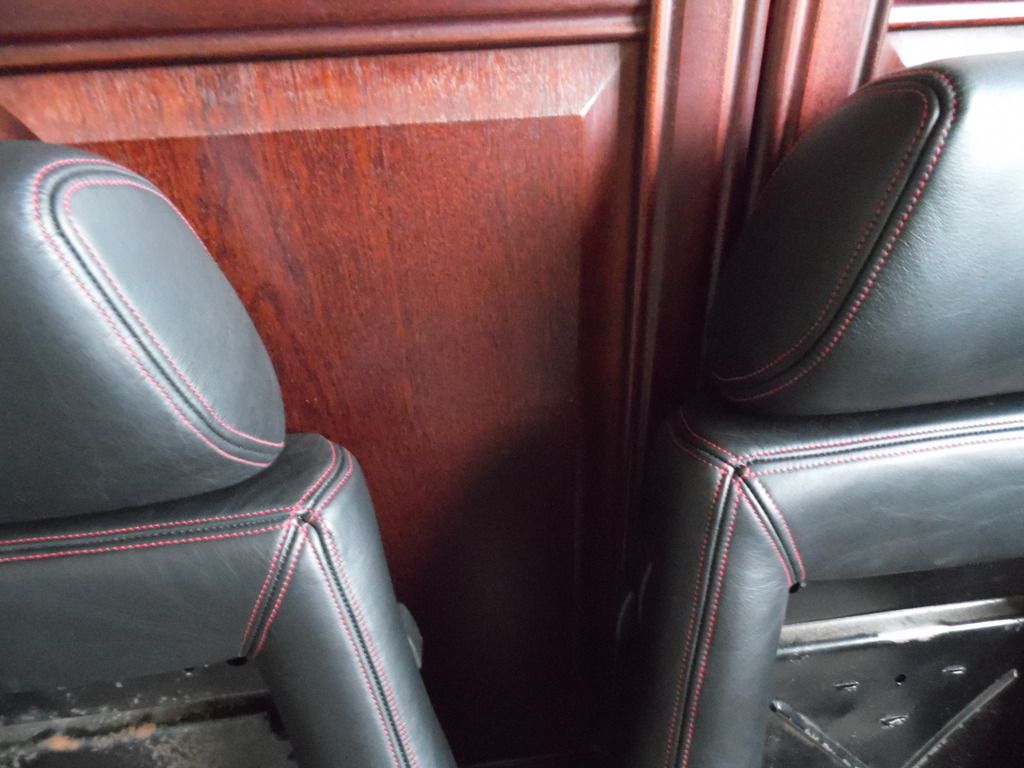
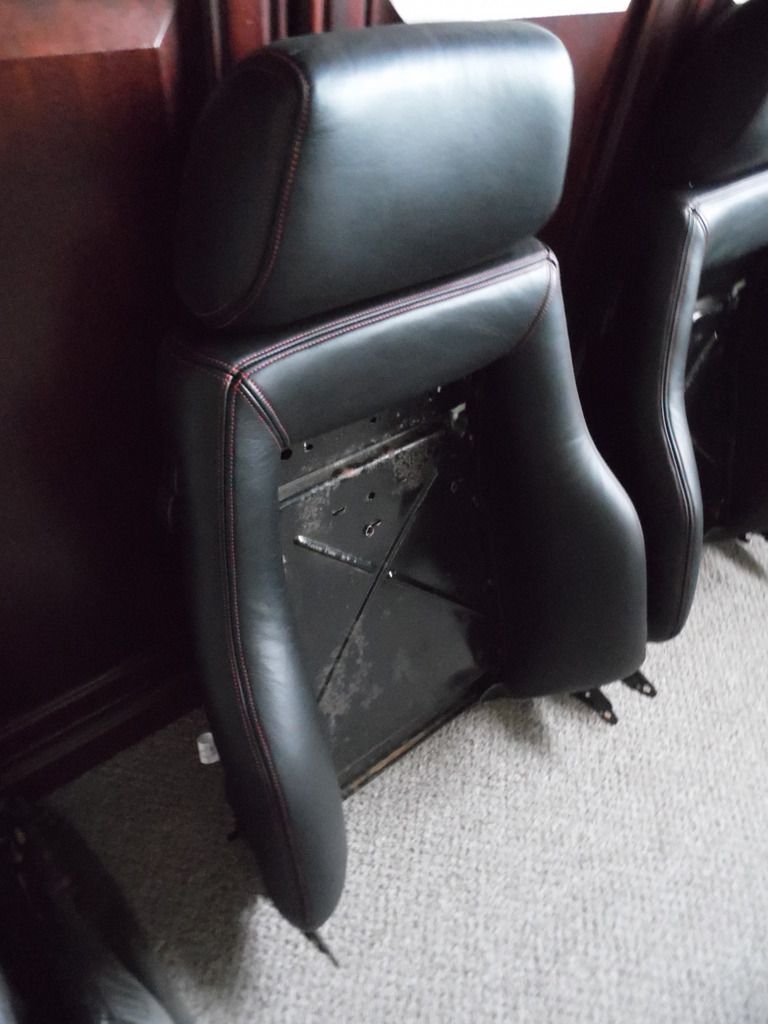
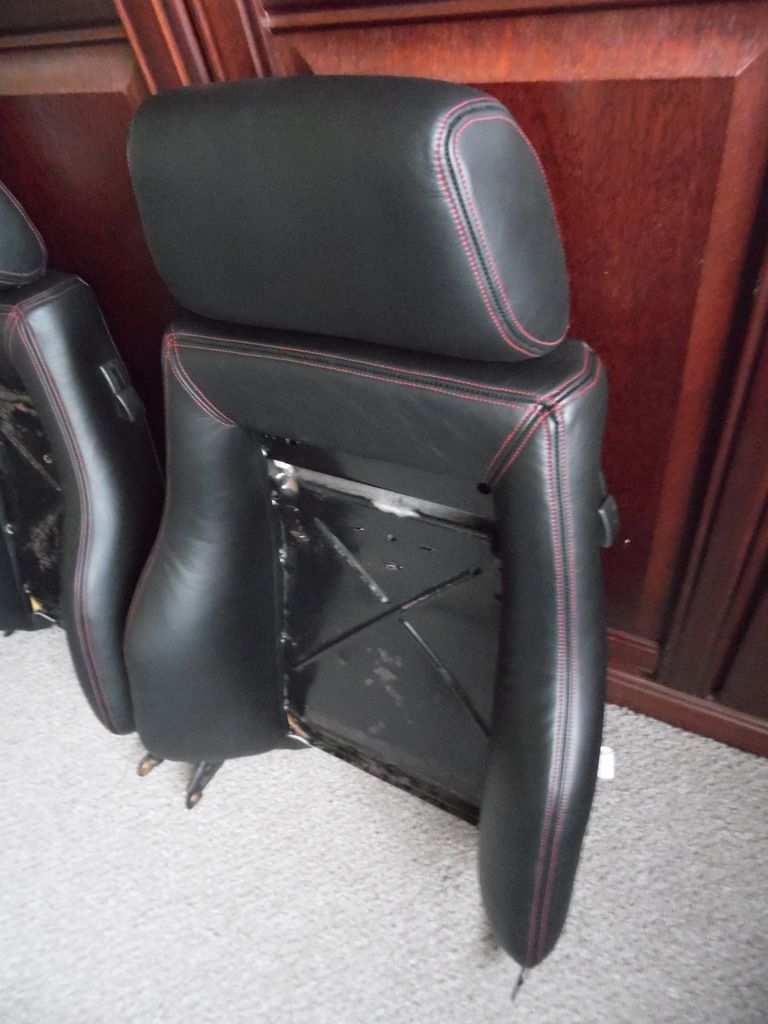
Black leather and red stitching. Very suave! They feel nice and firm again, and silky smooth. It should all look rather great when it's all finished and refitted into Tony's red Cabbie!
-
Yep, that's pretty much the only way to go.
Finding some, on the other hand, is proving to be troublesome.....
-
Firstly, I'd like to express my appreciation to Tony for his patience. He was originally supposed to have everything back from me in May but that just didn't happen. Then I used a couple of hides of top quality leather whilst trying to settle on an effective design for his doorcards, so I had to wait for more to be delivered.
He's been a top bloke so Thank You, Tony!
Anyway, now I come to one of the downsides of working on "old cars" - other peoples' modifications!
Someone has "modified" the Recaro seat bases, presumably so they sit lower down in the car. The four mounting sections on each base, that the runners bolt to, have been removed with, from the look of it, a chisel.
That means that the new leather covers won't fit properly without modification.
However, just to add to my misery, the bases have then been drilled (presumably to mount the runners) but no captive nuts have been welded. This means that when Tony comes to mount the runners, he's going to have to half-remove the new covers in order to do so. And when the runners are mounted, he's not going to be able to fasten the new covers back into place. Because the runners will be in the way!
Then, just to add to the problems, the foremost mounting holes appear to utilise the existing hole that the seat diaphragm clips into at the very front of the base. Which means that the diaphragms can't be fitted correctly, which means they'll look a bit poor and also won't support the seat foam properly!
All in all, this is not a good situation. I think the best solution is to try and source a pair of replacement baseframes, unless Tony for some reason needs his front seats to be 1.5" lower than standard. But to be honest, if I try to use the frames I have here, his front seats are going to look and feel pretty crap as the bolster covers won't fit properly and the diaphragms will sag.
Welcome back to old Escorts, Si...

-
Loads Pic's of the interior when you get em back Tony
I'll be posting loads of pics here of the interior as I'm working on it...!

-
I'll just add my pictures to this thread when I get started on your interior, Tony!
-
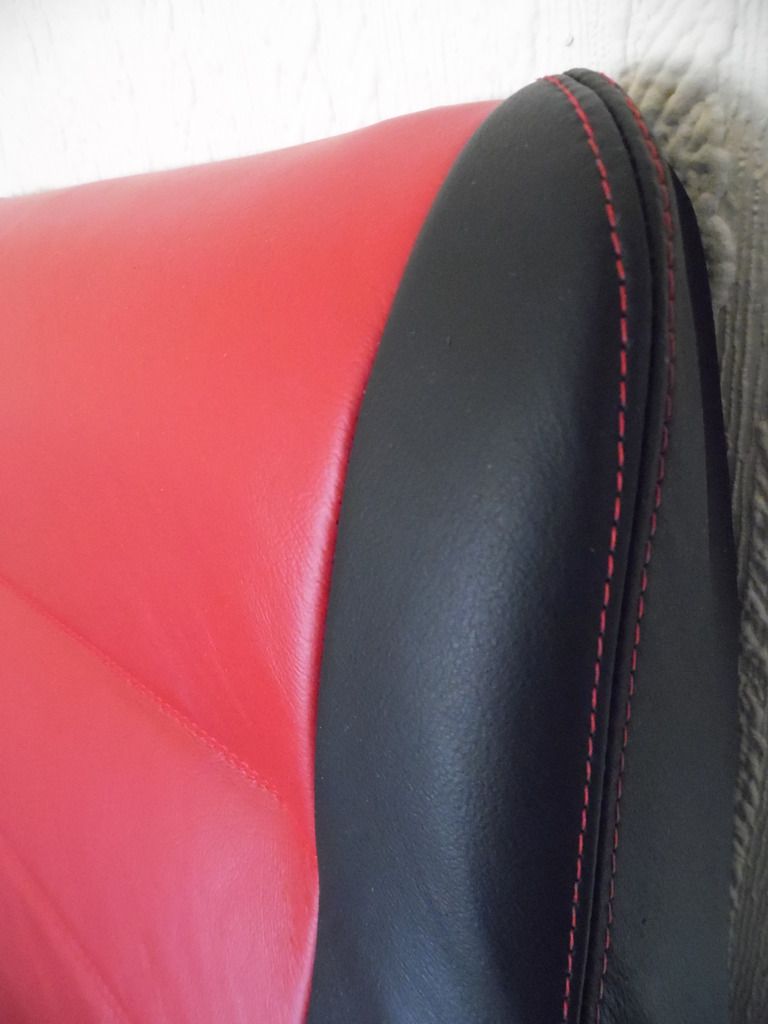
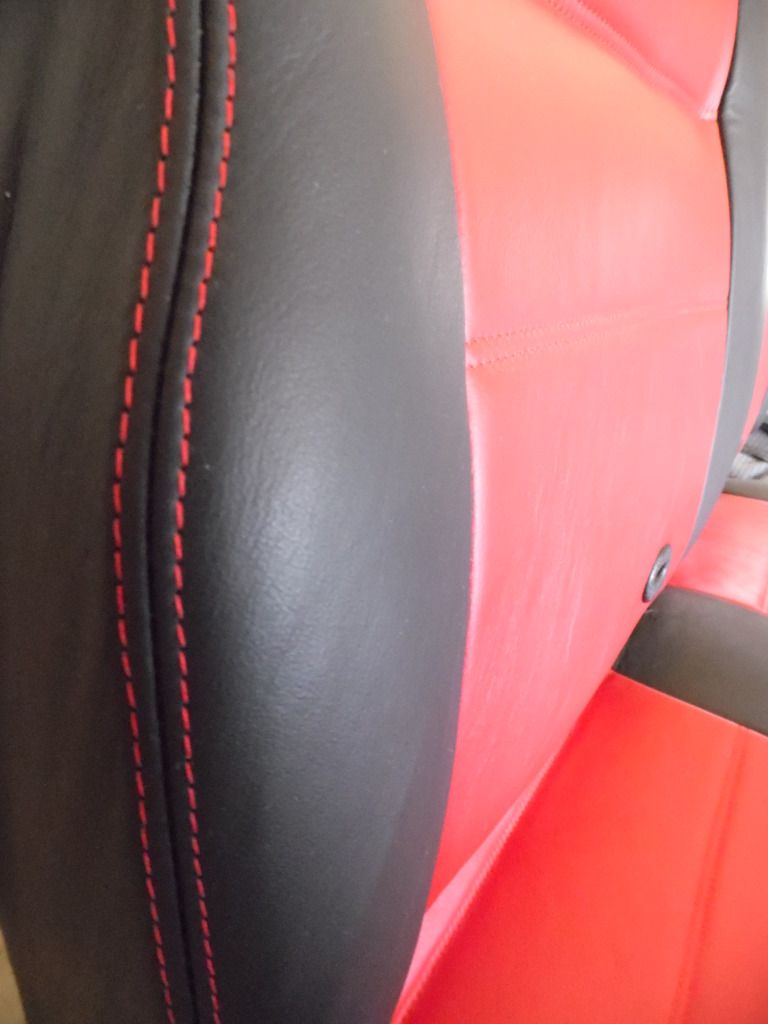
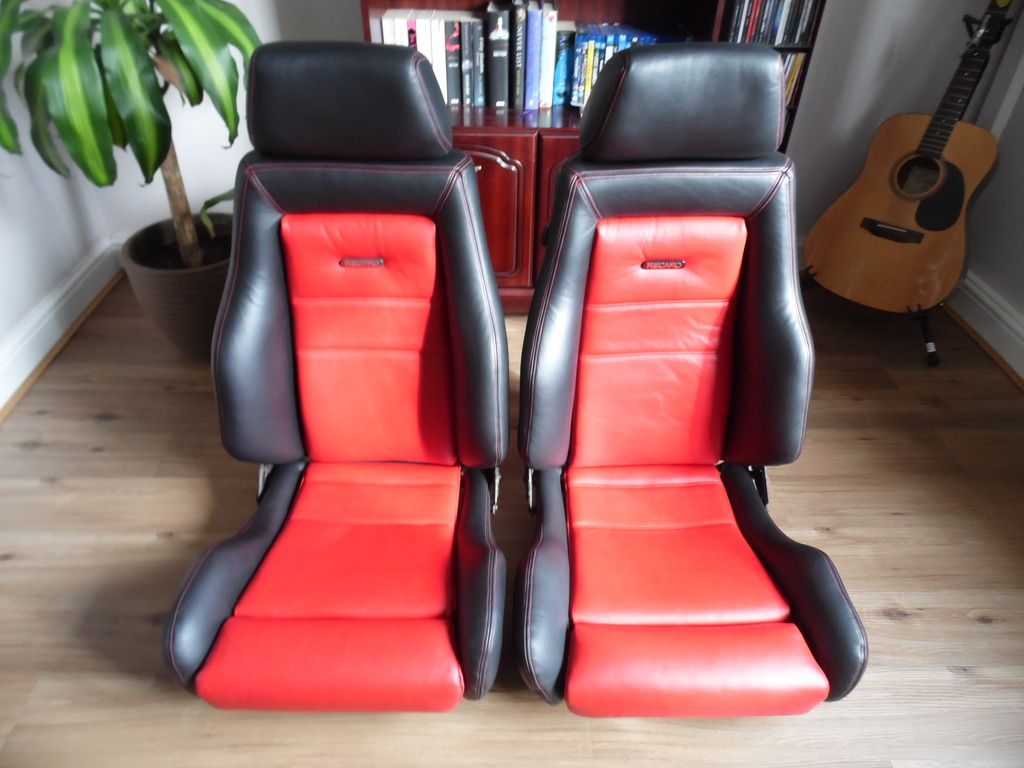
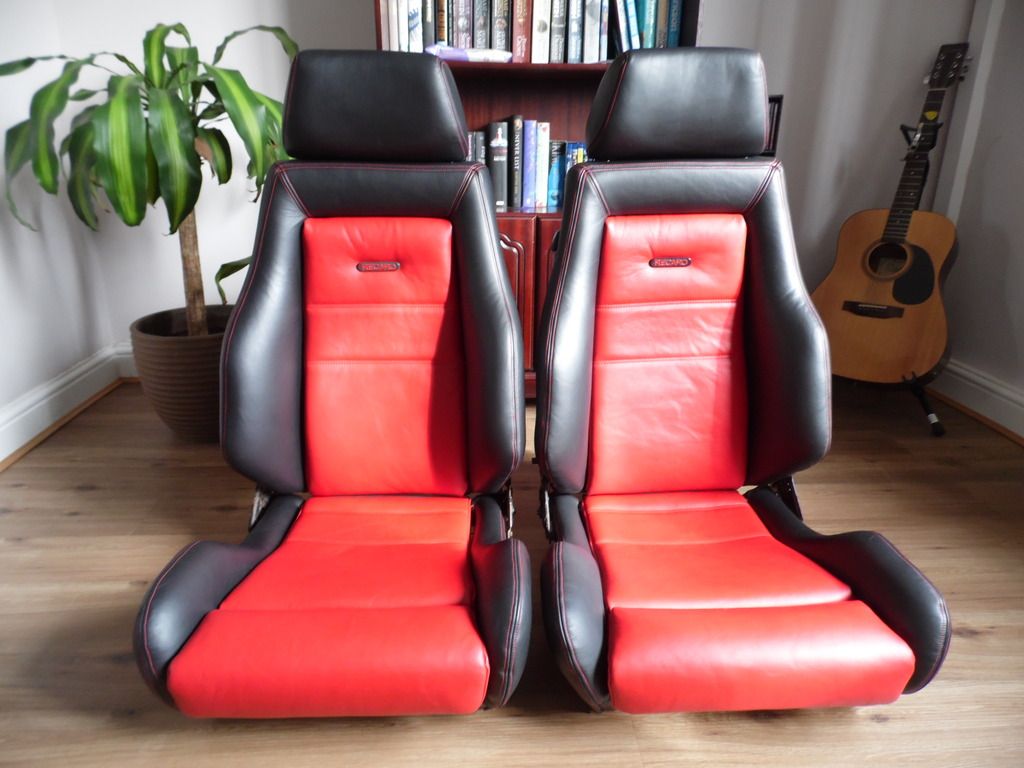
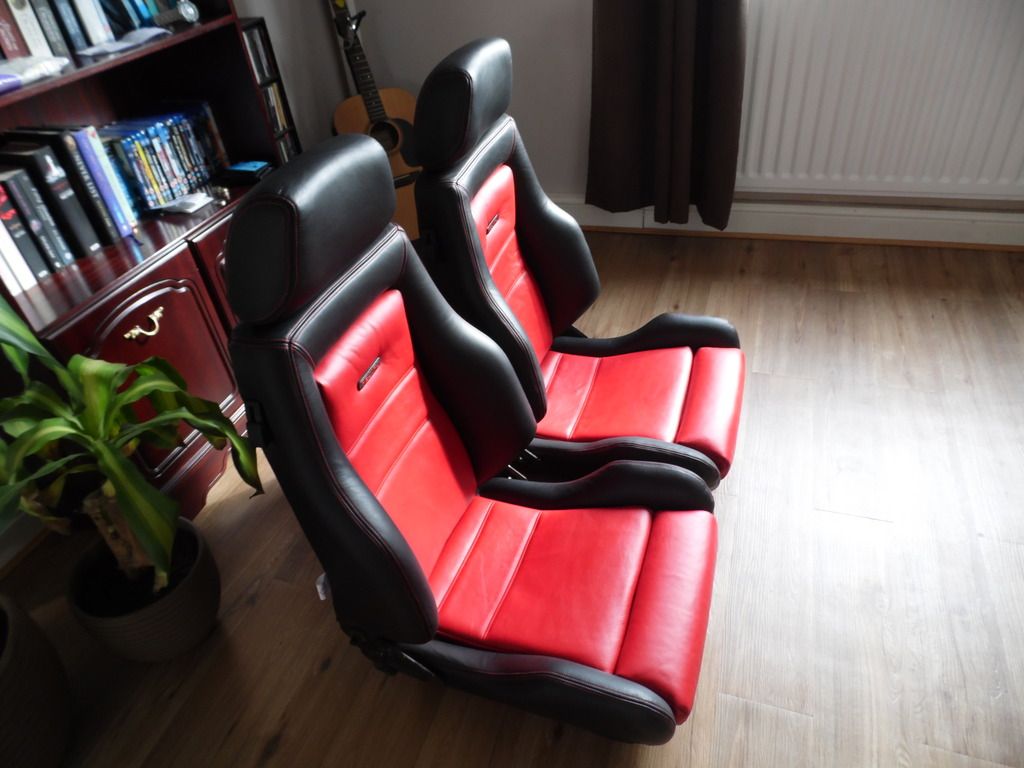
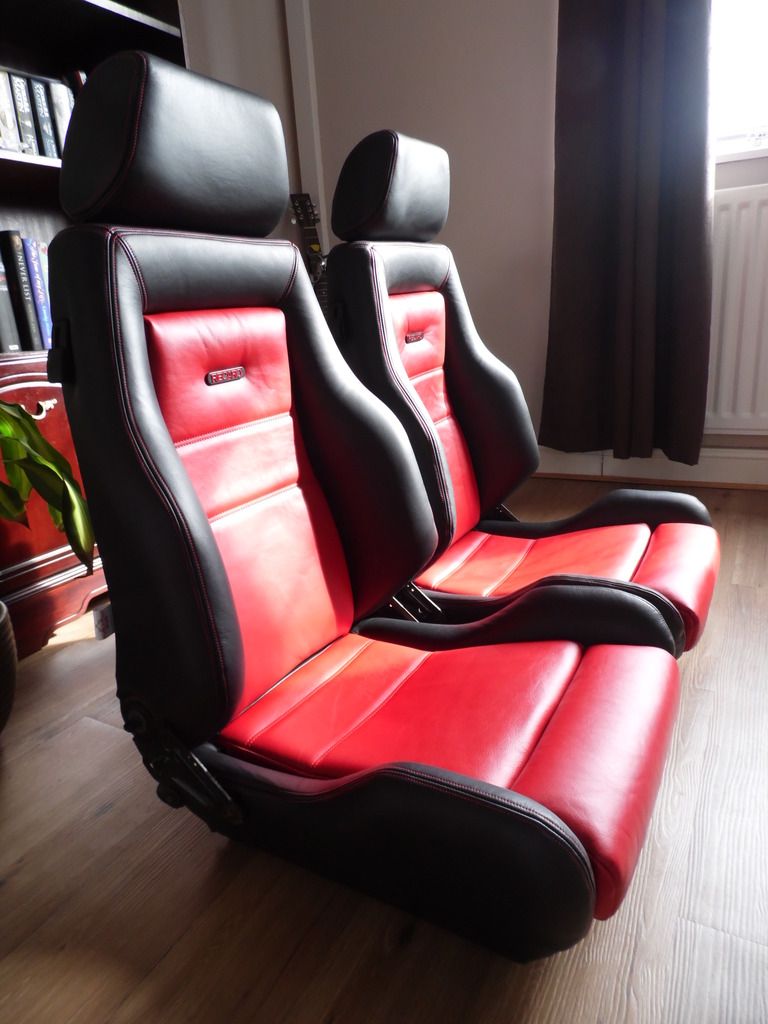
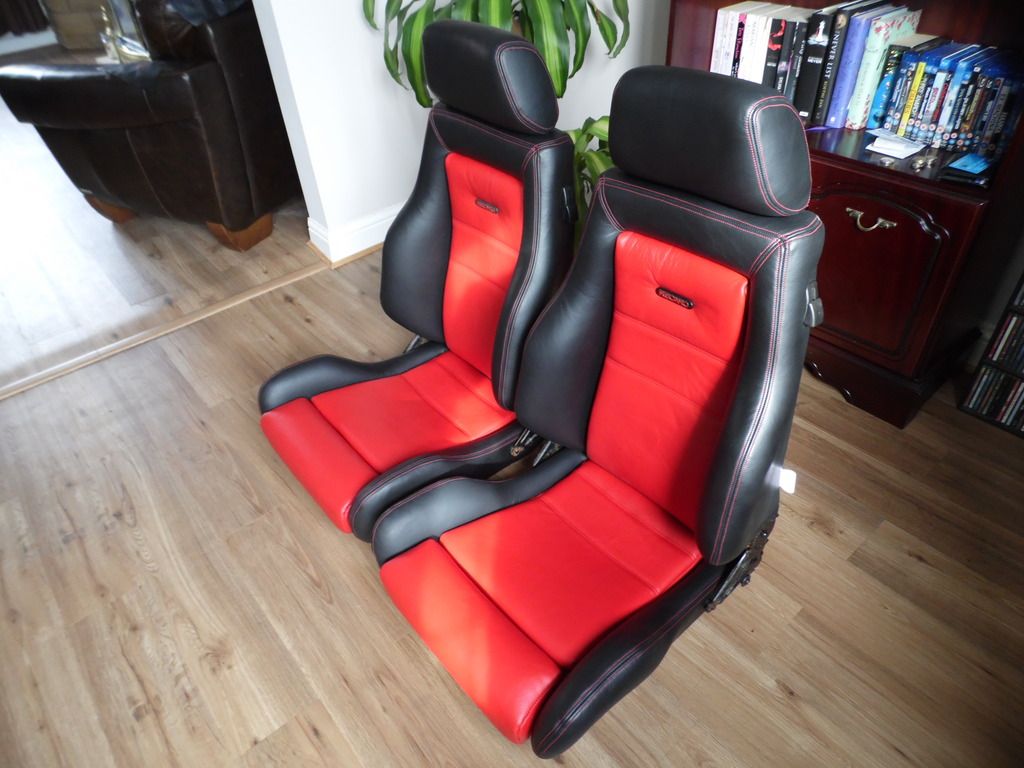
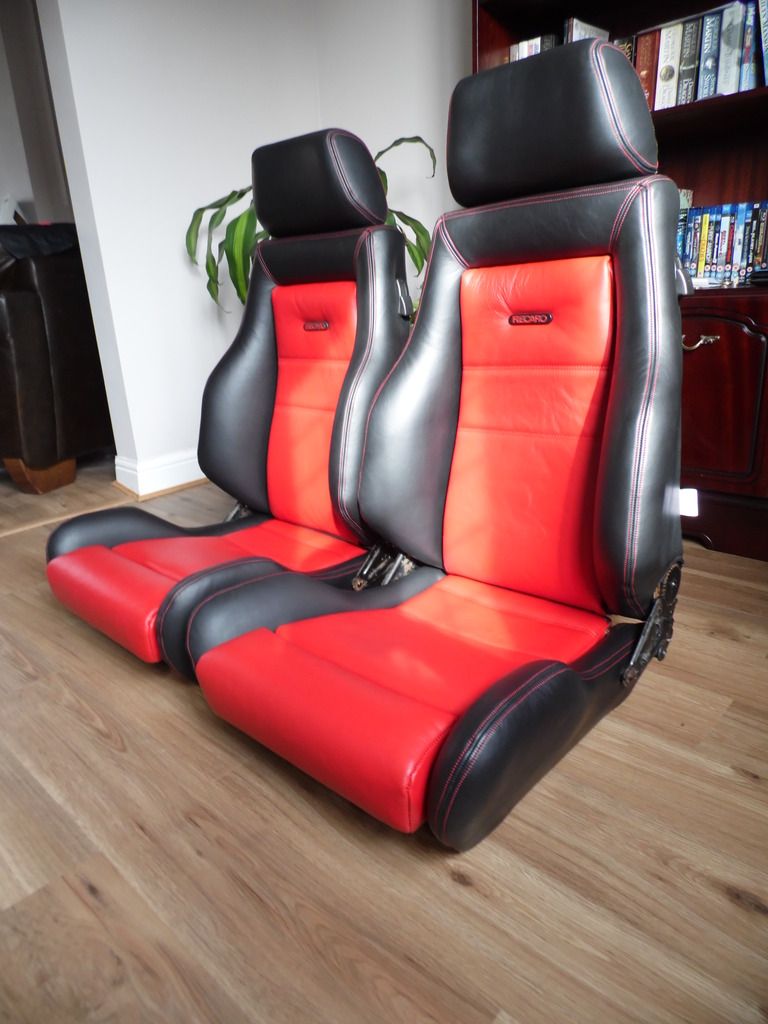
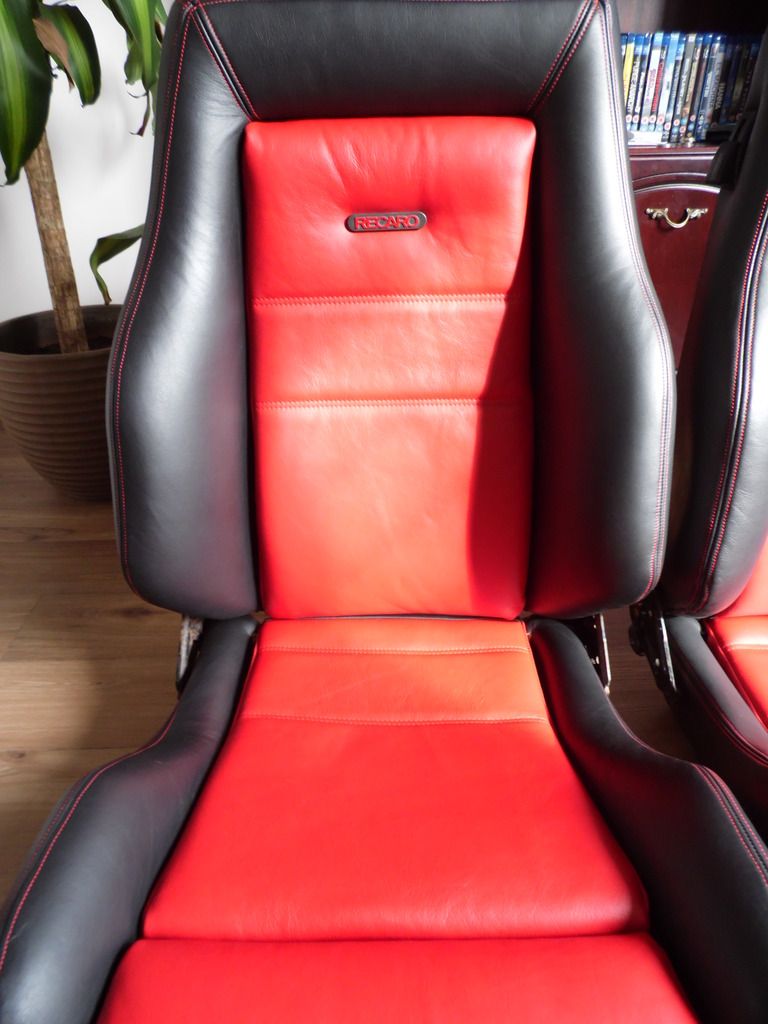
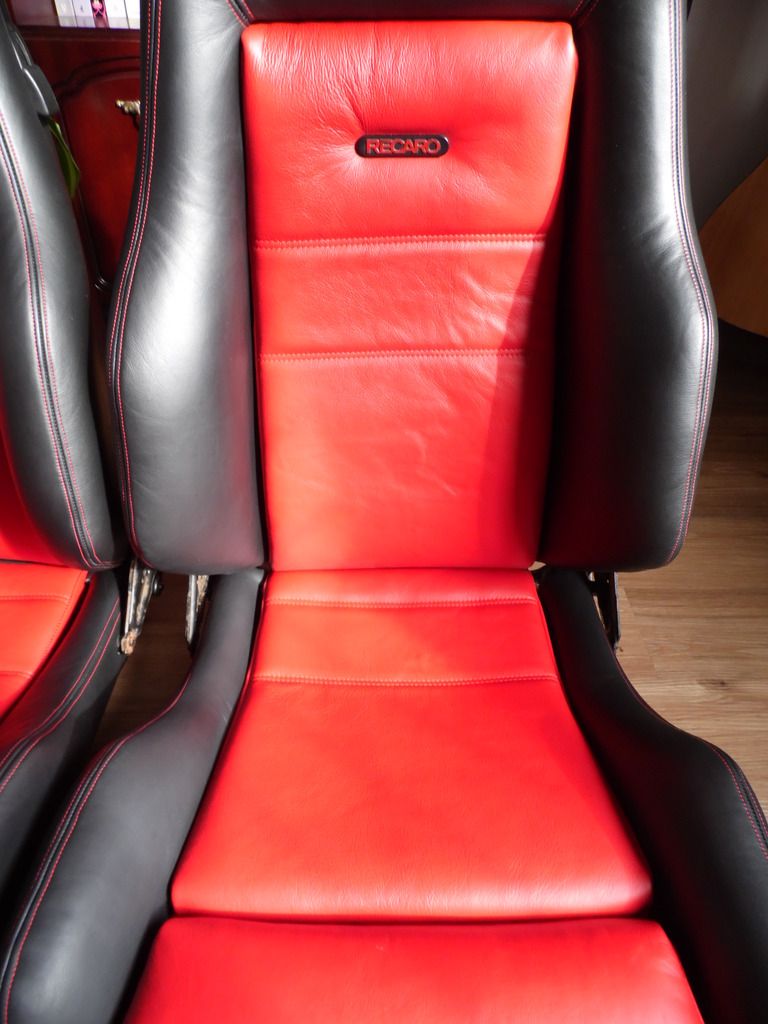
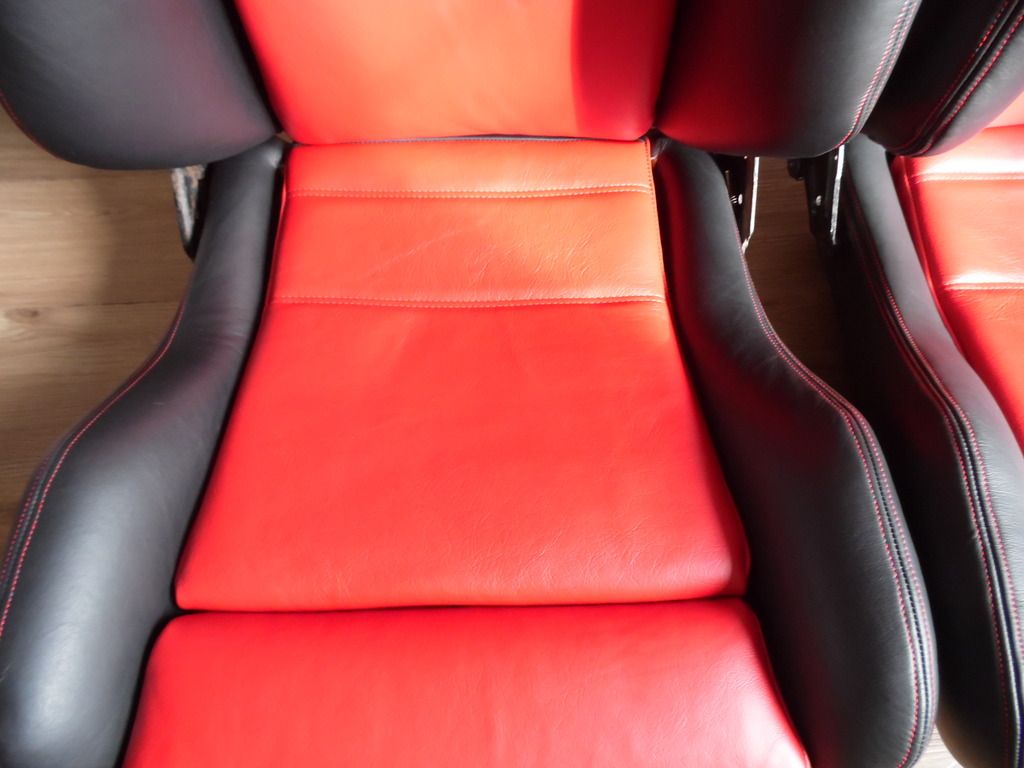
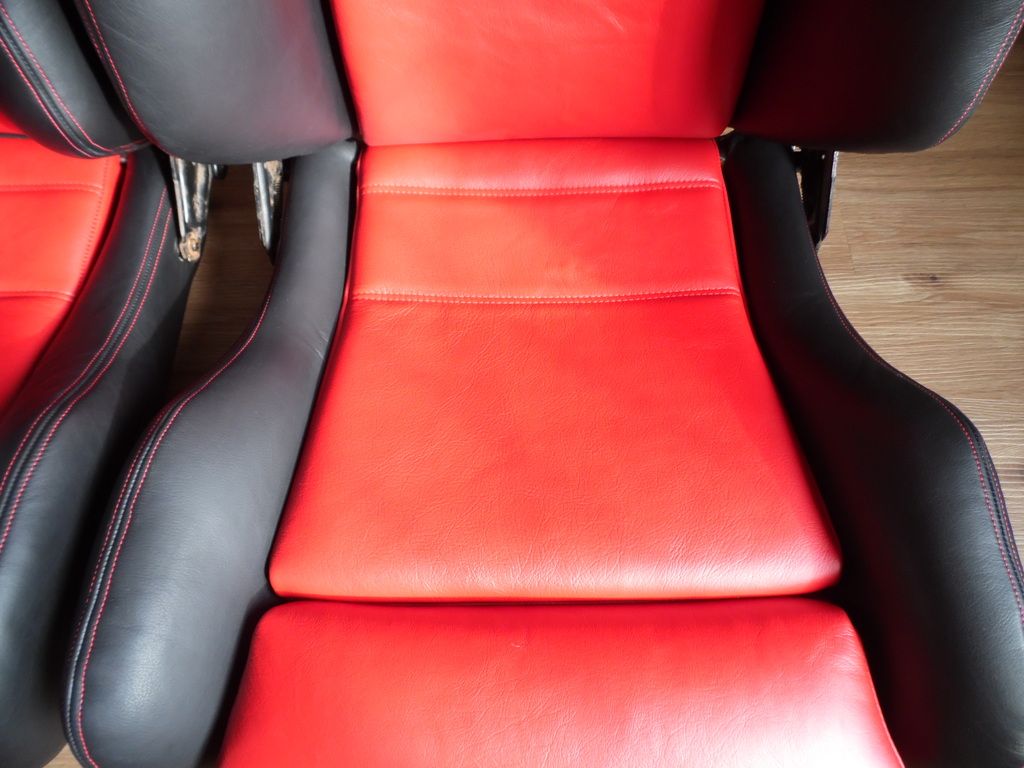
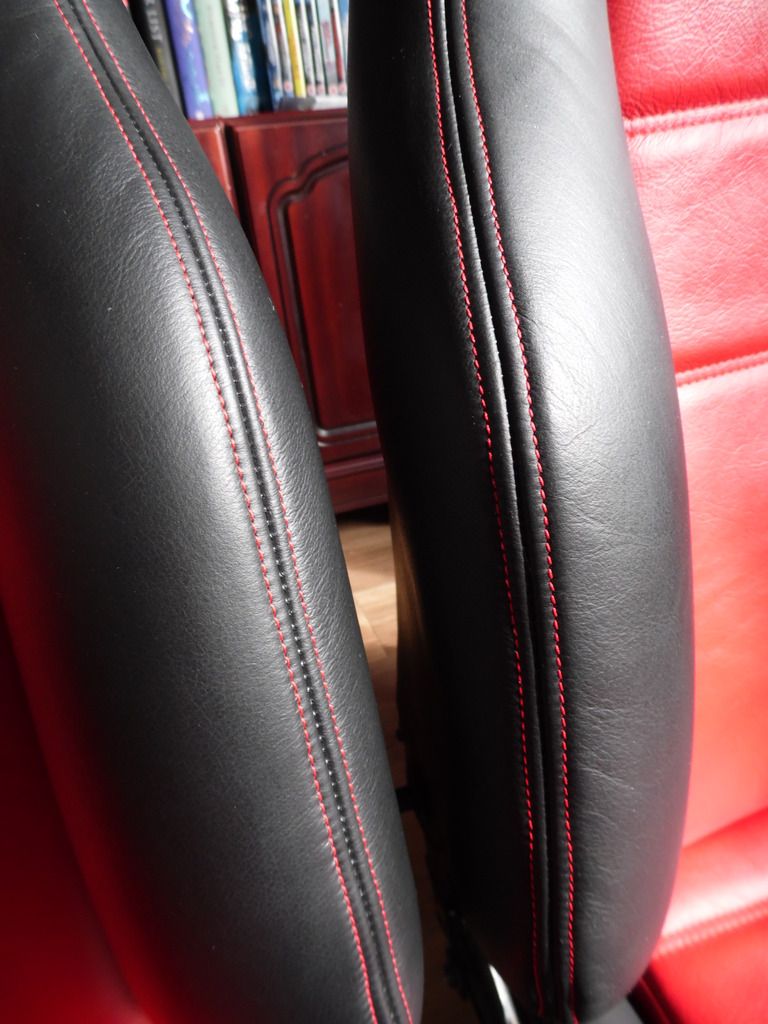
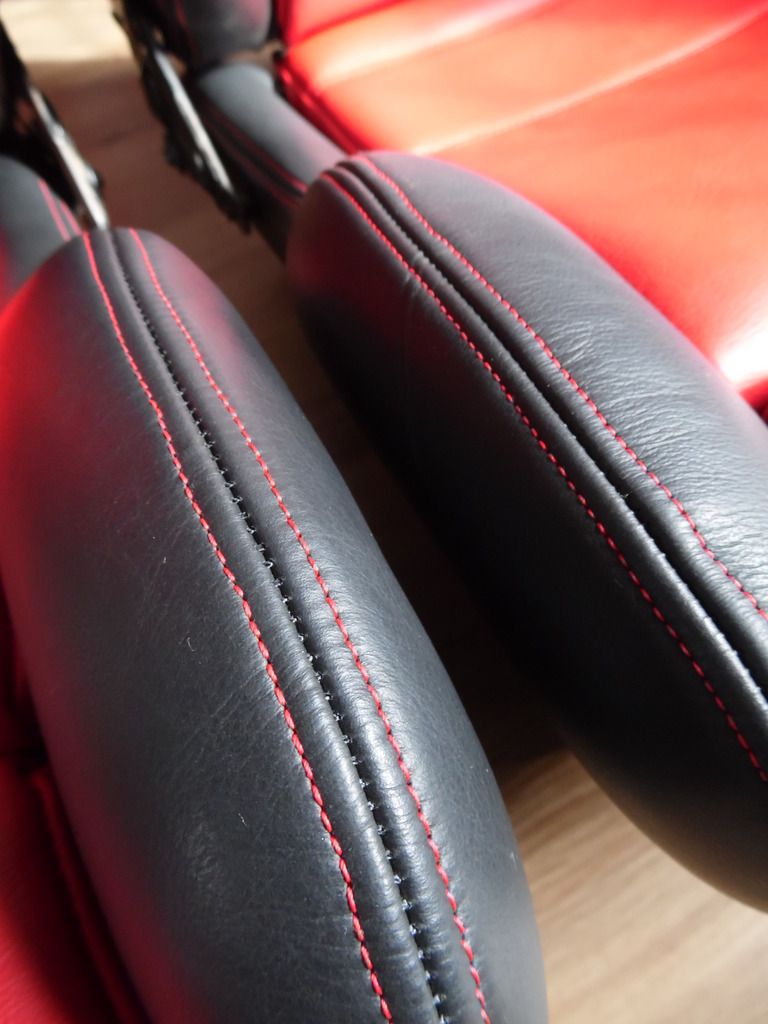
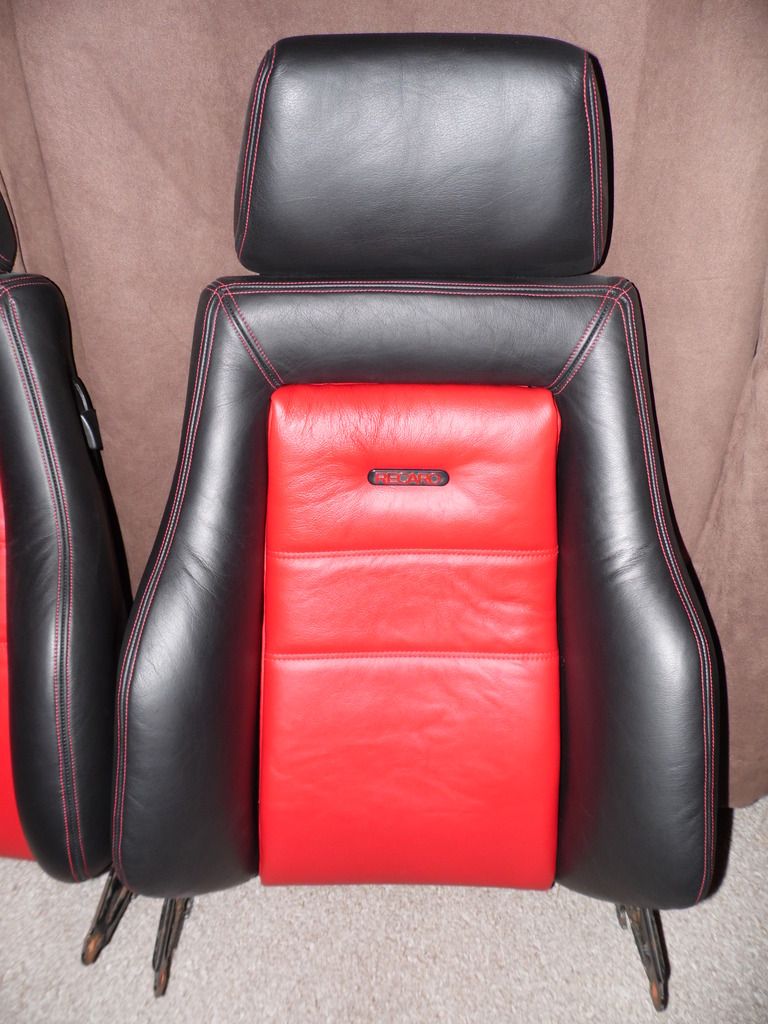
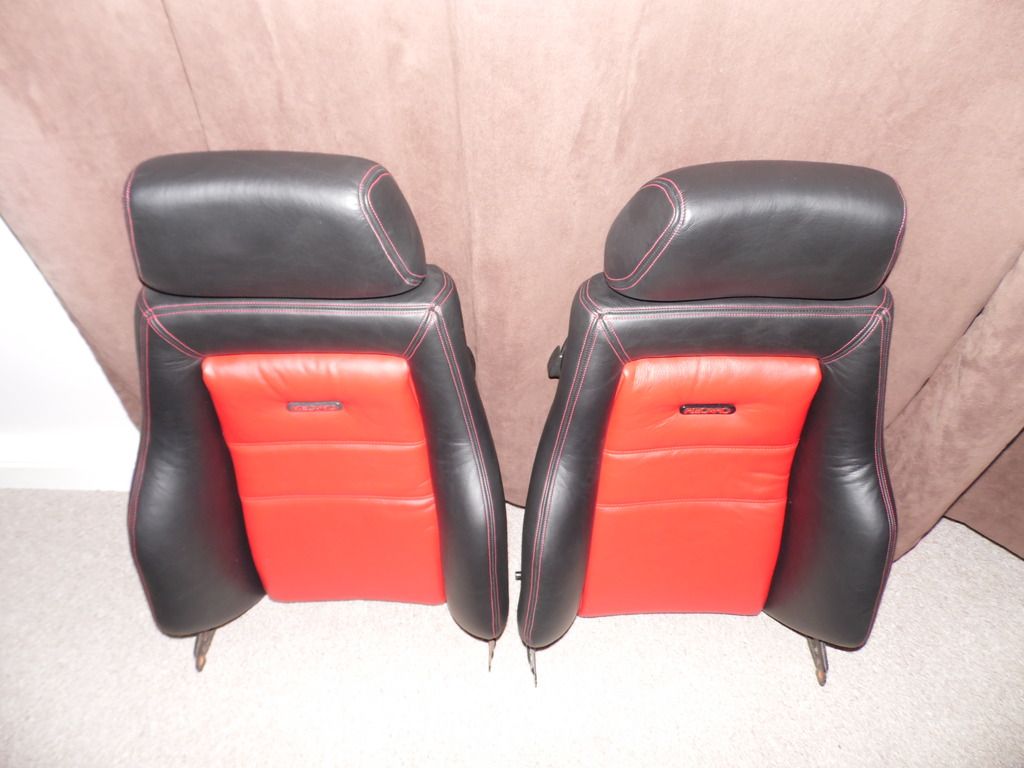
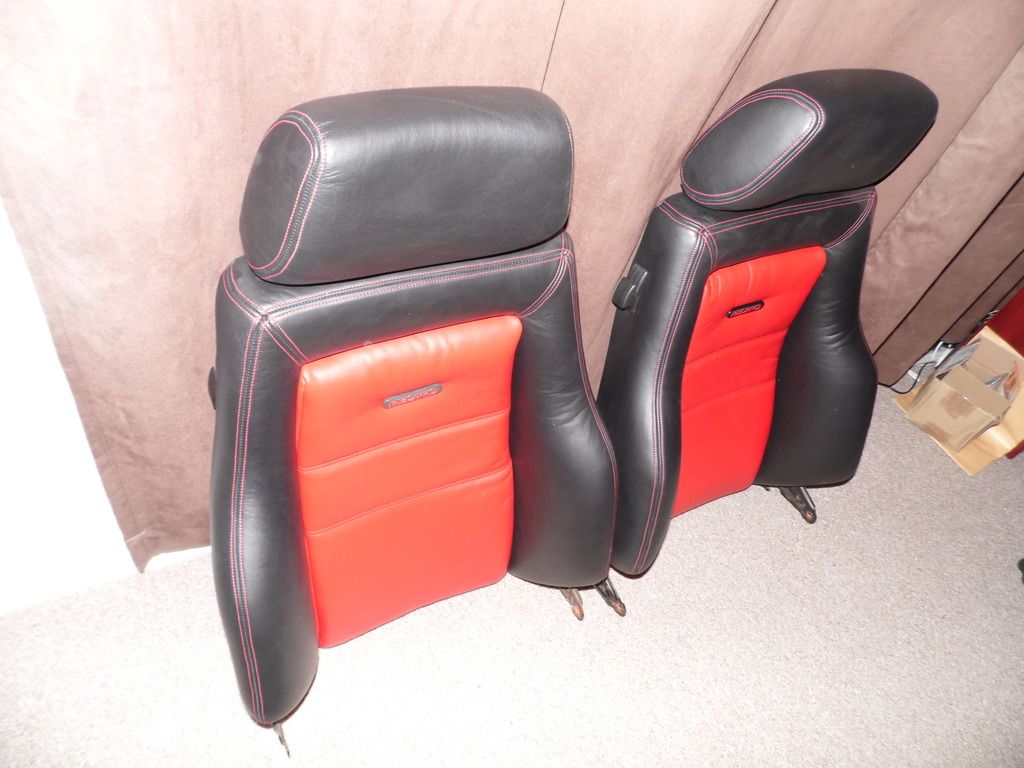
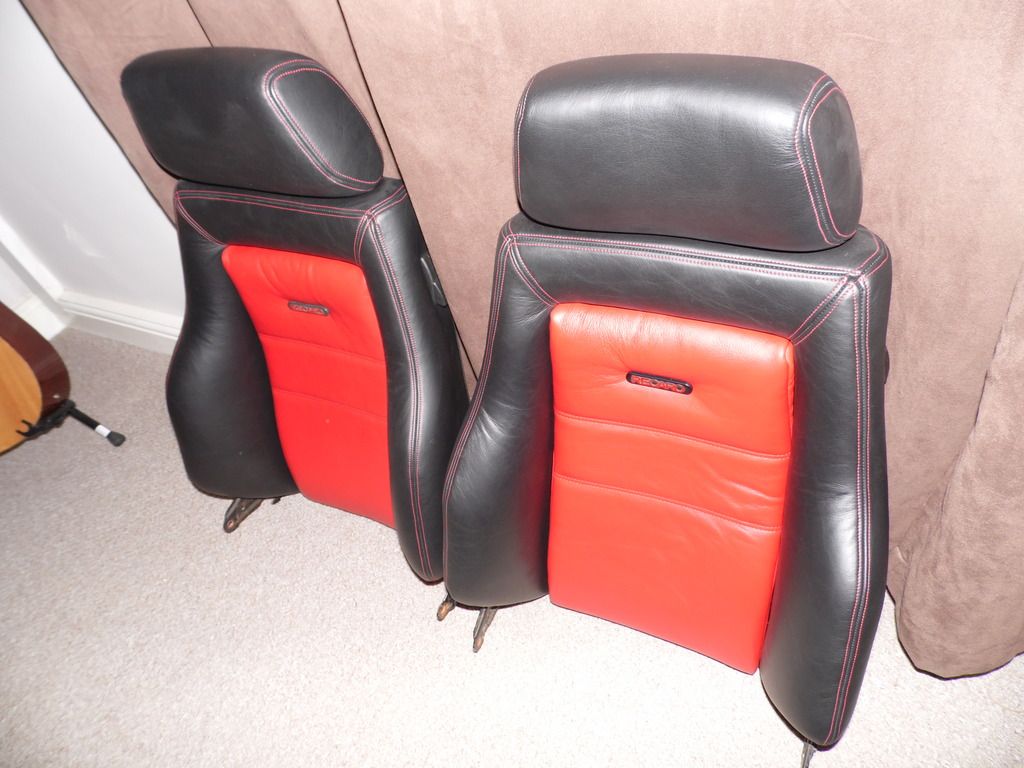
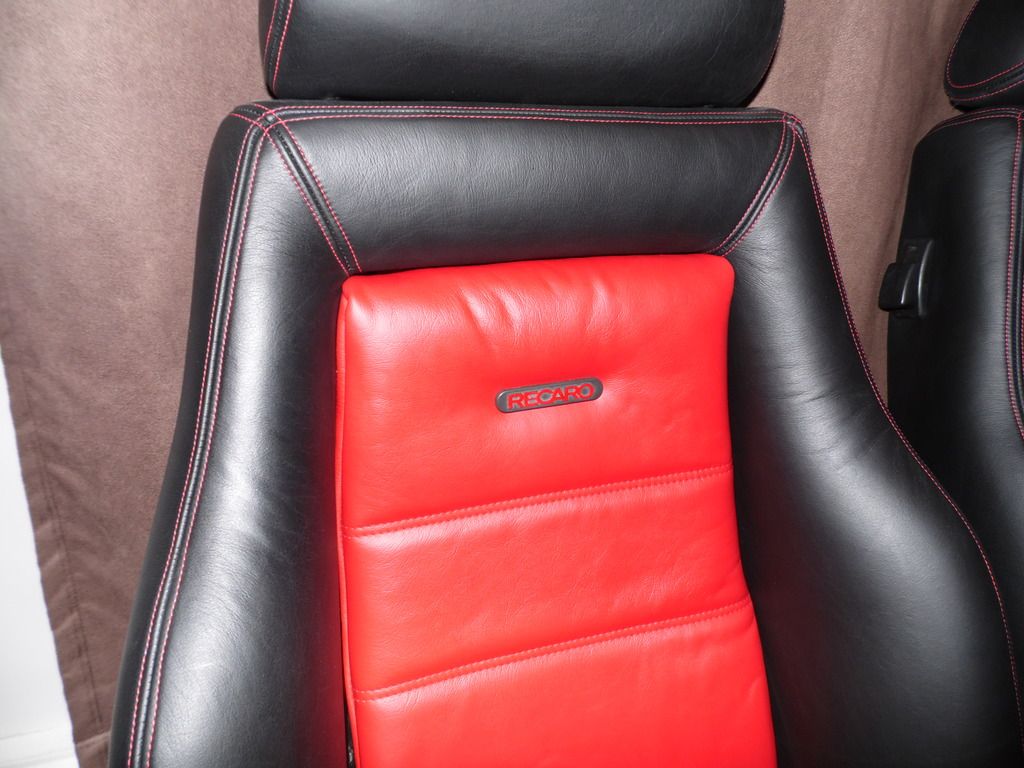
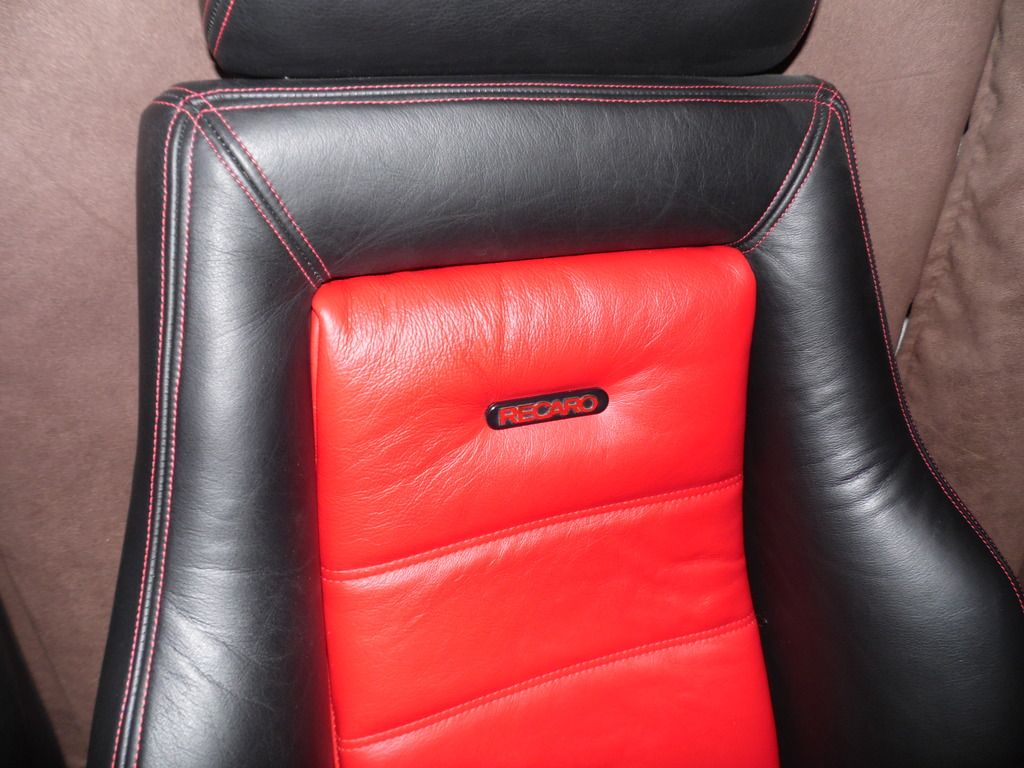
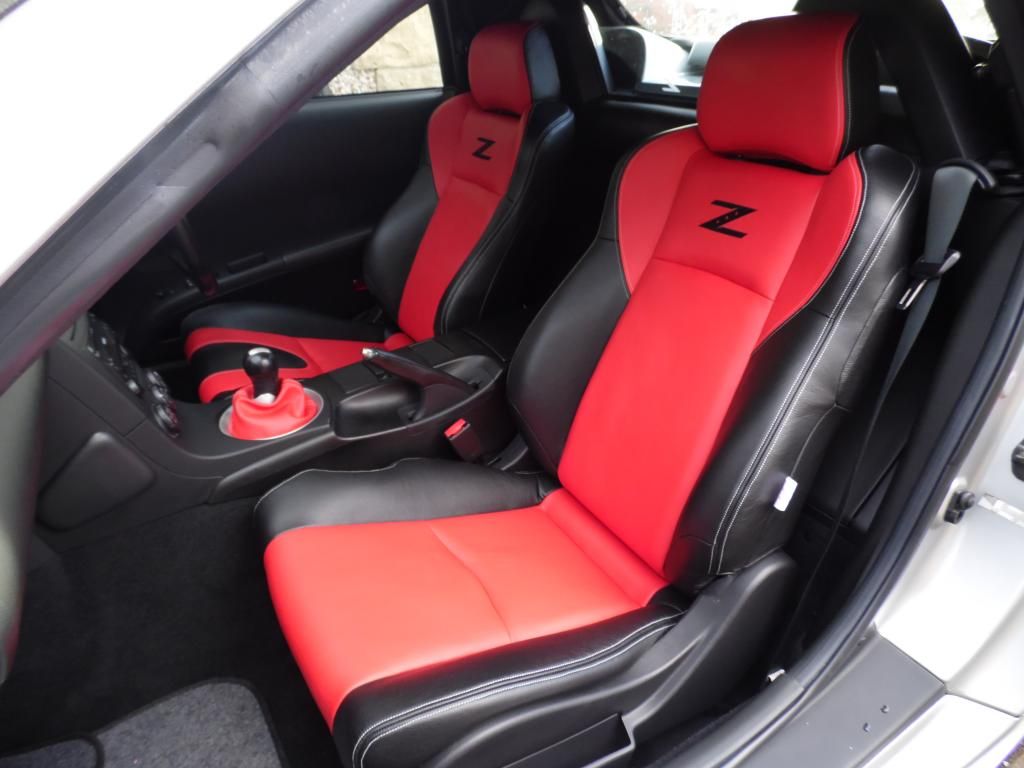
Just as an aside here... this is a good approximation of what the red and black colour scheme will look like (albeit on different seats, of course):
-
I'd love to take the Datsun for a blast around the continent!
-
Guess my inserts are having to wait now! Uwill be well hsppy with simons work mate
You keep changing your mind on what you want doing anyway...! Ha!
-
Personally, I'd opt for black.
I've seen many cars where there's been bright colours involved and, in my opinion, the bright colours should be used as accents rather than as huge loud statements!
Less is more, and all that...
-
That looks even better now the horn-push and everything's fitted!
-
I'll shortly be reproducing the mk4 tonneau covers in leather. My objective is to have these 100% ready to fit, so the press-studs will be present and I'm hoping to make the internal plastic fittings in very firm leather.
These will be full leather throughout, all the seams will be topstitched so they'll look nice and decorative when fitted.
Obviously, people can choose the leather and stitching colours they want.My question is: what sort of price would people expect to pay for such a thing...?
-
As promised, some daylight shots
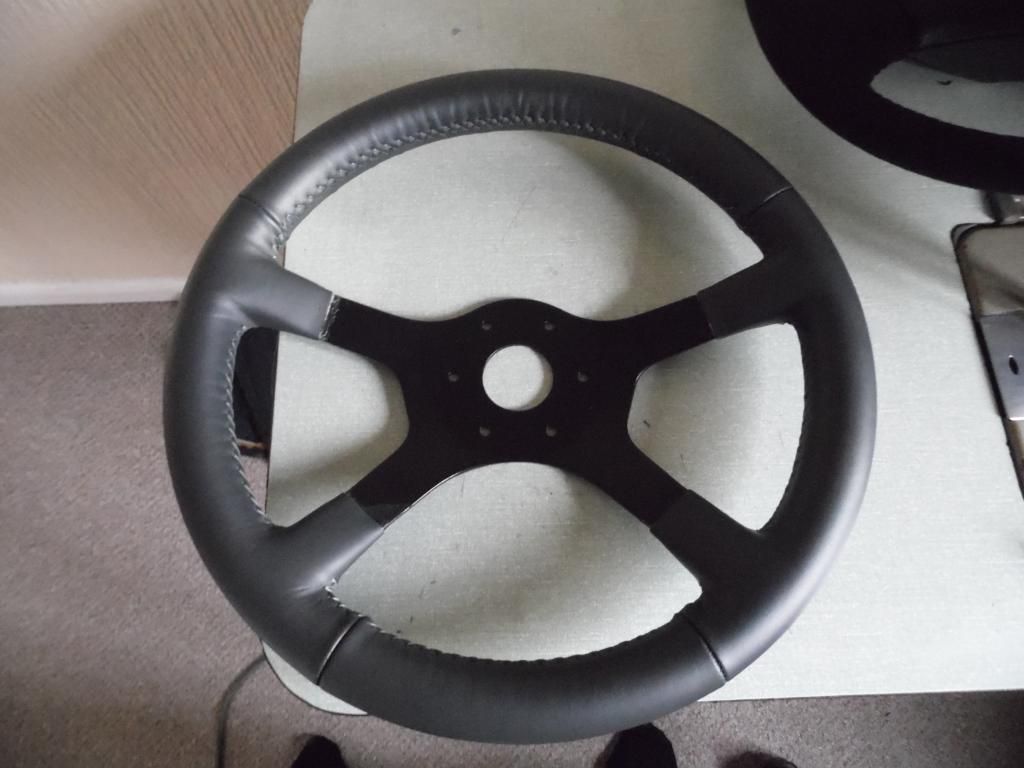
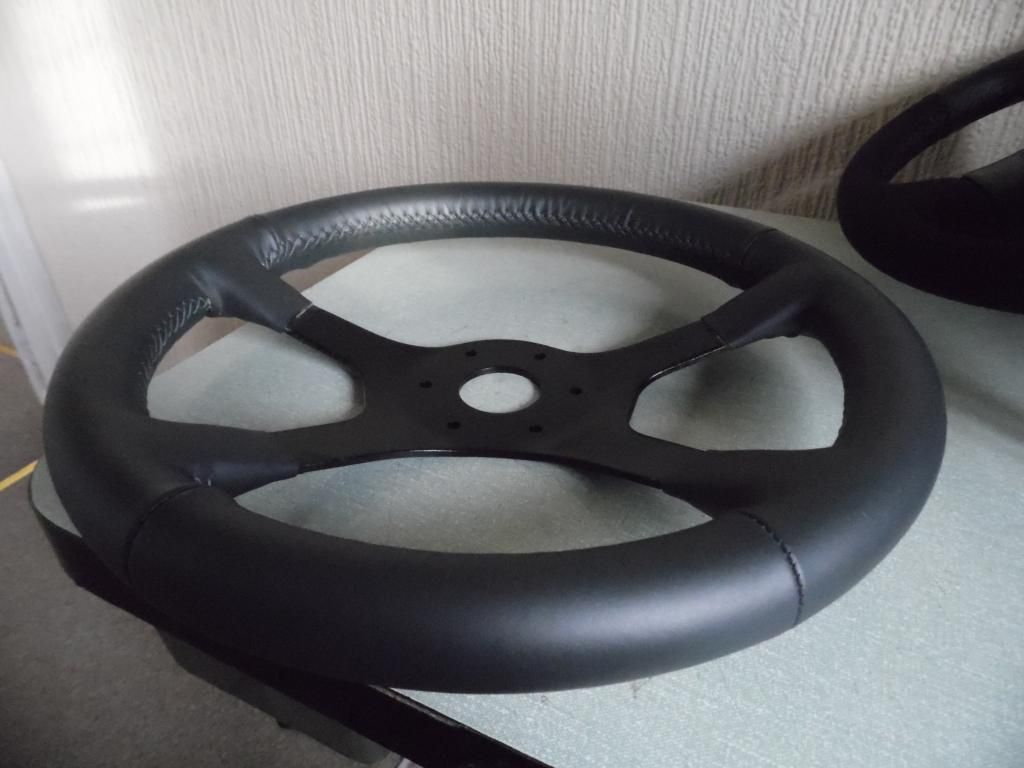

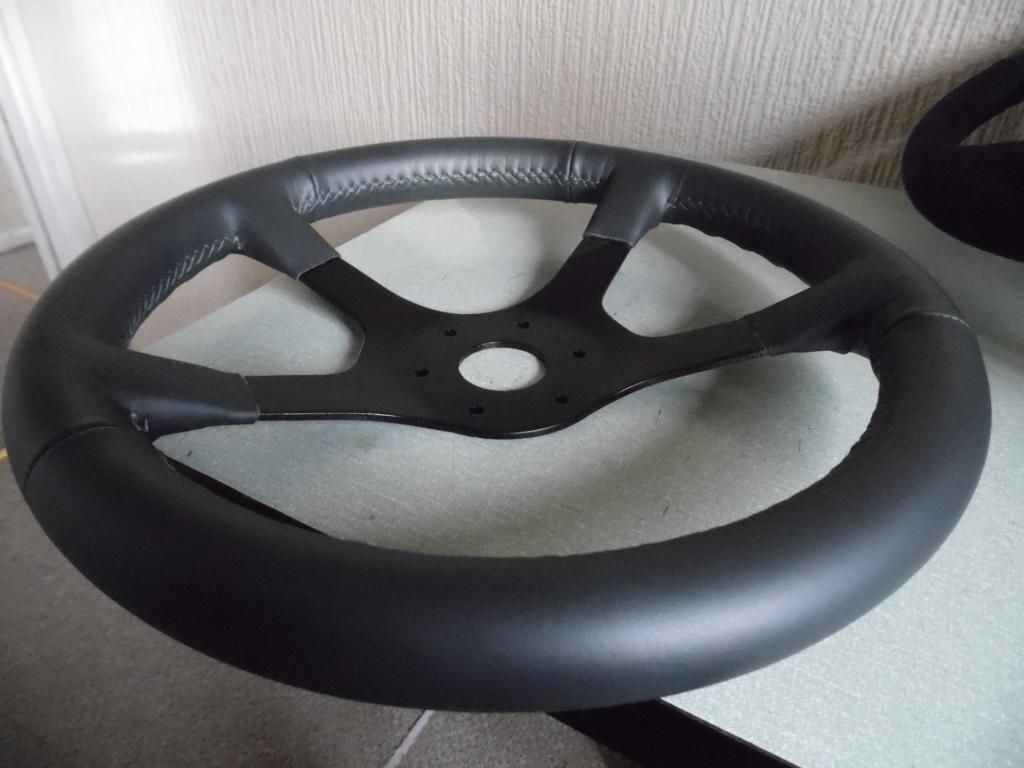

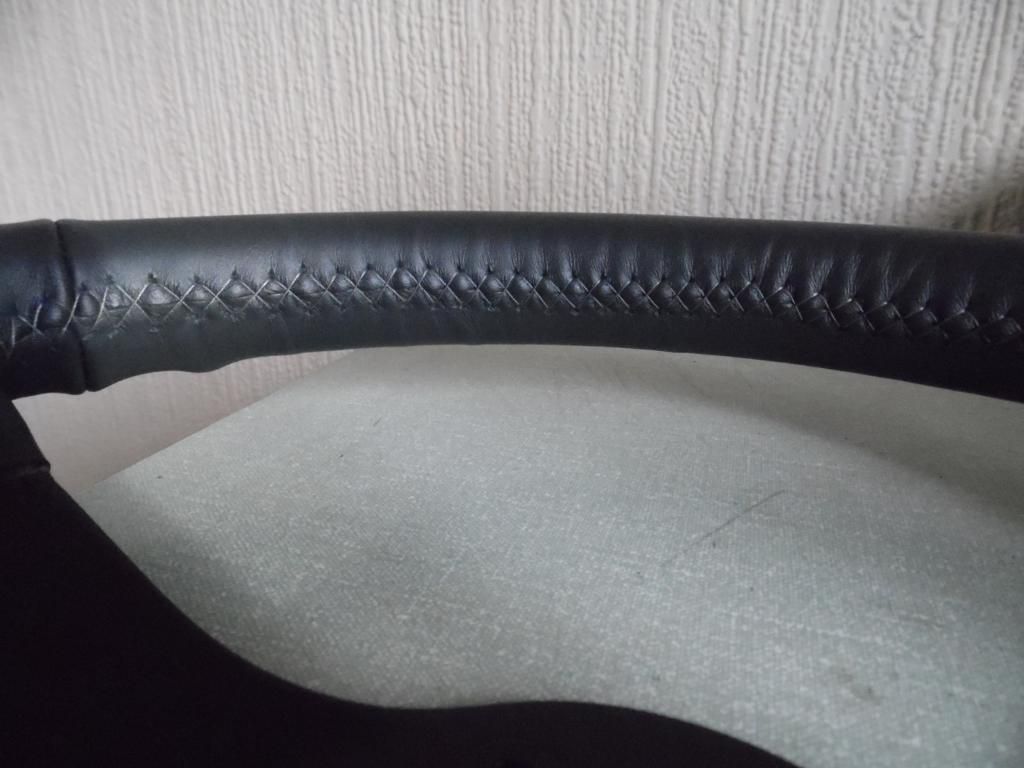
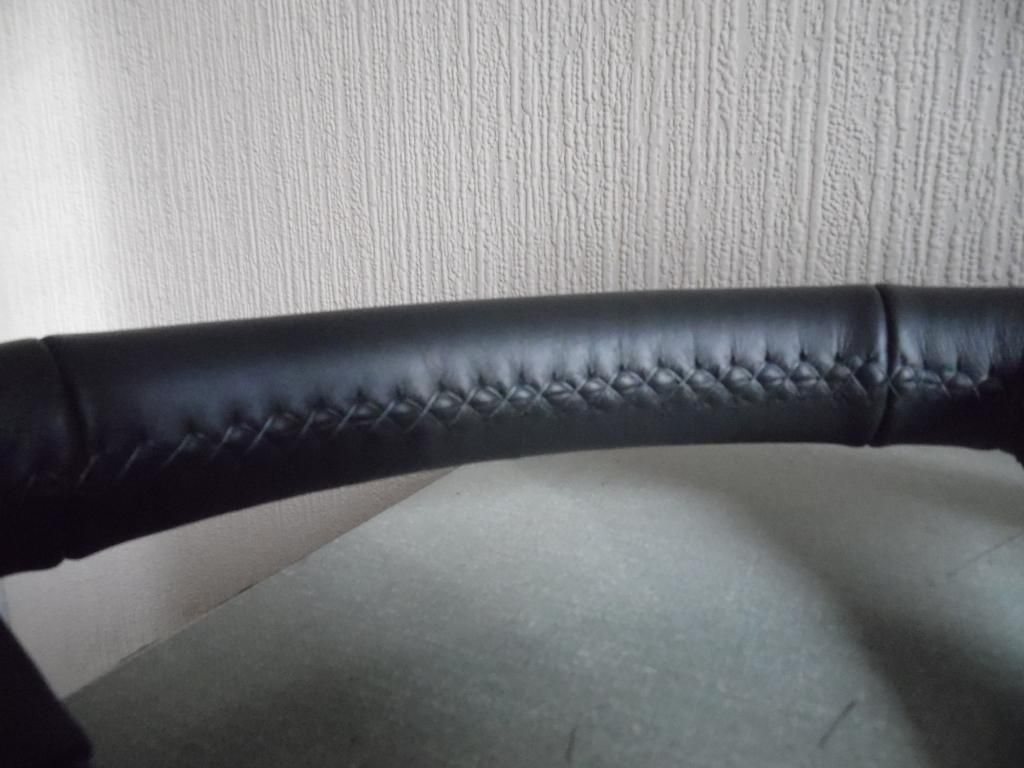
The original cover was made up of a sinle piece of leather, but I thought that looked a little bland so I've made John's new rim from four stitched pieces.
It's also been padded out so it feels chunkier in the hands.It should look rather nice against the rest of his leather interior!
-
John's steering wheel is getting dropped off with him on Sunday. I'll take some more pictures in daylight today and post 'em up


Another Interior Retrim!
in Restoration & Project
Posted
Thank you
Just the sort of reaction I like
They're like old friends now! Pretty much do them with my eyes shut nowadays.
I started out trimming a pair of Recaro LS seats and I can imagine me doing a pair when I breathe my last too!
Agreed!